<?xml version="1.0" encoding="utf-8"?><feed xmlns="http://www.w3.org/2005/Atom" ><generator uri="https://jekyllrb.com/" version="4.4.1">Jekyll</generator><link href="https://meefik.dev/feed.xml" rel="self" type="application/atom+xml" /><link href="https://meefik.dev/" rel="alternate" type="text/html" /><updated>2026-09-19T18:25:31+00:00</updated><id>https://meefik.dev/feed.xml</id><title type="html">Meefik’s Blog</title><subtitle>Thoughts, tutorials and ideas about programming, technology and open source.</subtitle><author><name>Anton Skshidlevsky</name></author><entry><title type="html">E-paper TTY for CrowPanel ESP32-S3</title><link href="https://meefik.dev/2026/08/04/paper-tty/" rel="alternate" type="text/html" title="E-paper TTY for CrowPanel ESP32-S3" /><published>2026-08-04T18:00:00+00:00</published><updated>2026-08-04T18:00:00+00:00</updated><id>https://meefik.dev/2026/08/04/paper-tty</id><content type="html" xml:base="https://meefik.dev/2026/08/04/paper-tty/"><![CDATA[<p>I got a <a href="https://www.elecrow.com/crowpanel-esp32-5-79-e-paper-hmi-display-with-272-792-resolution-black-white-color-driven-by-spi-interface.html">CrowPanel ESP32-S3</a> — it’s a 5.79” e-paper display with the ESP32-S3 built in, USB-C powered, all in one board. The screen is big enough to be useful and small enough to sit on my desk without being obnoxious.</p>

<p>The obvious thing to do with an e-paper display that holds its image with zero power is write something to it and leave it alone. So I wrote <a href="https://github.com/meefik/papertty">papertty</a>: firmware that listens on USB serial and renders whatever text you pipe to it. Basically a physical <code class="language-plaintext highlighter-rouge">tty</code> backed by paper.</p>

<p>The display runs at 272×792 in B&amp;W — two SSD1683 panels stitched together via SPI. Firmware is Arduino/C++, built with PlatformIO. Nothing exotic.</p>

<video controls="" poster="/assets/images/paper-tty.png">
  <source src="/assets/videos/diy-eink.mp4" type="video/mp4" />
  Your browser does not support the video tag.
</video>

<p>Source on <a href="https://github.com/meefik/papertty">GitHub</a>. There’s also a <a href="https://www.youtube.com/watch?v=rNpEEjpG83k">demo video</a> if you want to see it actually working instead of trusting my word for it.</p>

<!--more-->

<h2 id="how-it-works">How it works</h2>

<p>The firmware does one thing: reads bytes from USB CDC serial at 115200 baud, buffers them, and renders accumulated text onto the e-paper frame buffer. The display driver handles pushing pixels to the SSD1683 chips. Loop, wait, repeat.</p>

<h3 id="input-buffering">Input buffering</h3>

<p>Serial data is messy — you get partial lines, then more data, then nothing for a while. Rendering every byte as it arrives makes the screen look like it’s stuttering. So the firmware waits: it accumulates bytes and only commits a frame after 1 second of silence. If something keeps streaming in, it just buffers (up to ~8KB) until the sender catches its breath.</p>

<p>This also matters for e-paper specifically — each refresh takes time because you’re literally moving charged particles in microcapsules. Fewer updates means less wear on the panel over months of use. Not a huge deal short-term, but e-paper panels do degrade with constant refreshing.</p>

<h3 id="auto-font-scaling">Auto font scaling</h3>

<p>Four fixed font sizes: 48px, 24px, 16px, and 12px. Before rendering, the firmware scans the buffer for the longest line and total number of lines, then picks the biggest font that fits everything on screen. No manual configuration needed — short messages render large, long <code class="language-plaintext highlighter-rouge">ls -la</code> output renders small.</p>

<table>
  <thead>
    <tr>
      <th style="text-align: center">Font</th>
      <th style="text-align: center">Char width</th>
      <th style="text-align: center">Max columns</th>
      <th style="text-align: center">Max lines</th>
    </tr>
  </thead>
  <tbody>
    <tr>
      <td style="text-align: center">48 px</td>
      <td style="text-align: center">24</td>
      <td style="text-align: center">33</td>
      <td style="text-align: center">5</td>
    </tr>
    <tr>
      <td style="text-align: center">24 px</td>
      <td style="text-align: center">12</td>
      <td style="text-align: center">66</td>
      <td style="text-align: center">11</td>
    </tr>
    <tr>
      <td style="text-align: center">16 px</td>
      <td style="text-align: center">8</td>
      <td style="text-align: center">99</td>
      <td style="text-align: center">17</td>
    </tr>
    <tr>
      <td style="text-align: center">12 px</td>
      <td style="text-align: center">6</td>
      <td style="text-align: center">132</td>
      <td style="text-align: center">22</td>
    </tr>
  </tbody>
</table>

<p>The algorithm is just some division and a <code class="language-plaintext highlighter-rouge">min()</code> call. Simple, but I had to handle the edge cases — empty input, content that barely fits, trailing partial lines without a newline. Those took longer than the main logic honestly.</p>

<h3 id="character-filtering">Character filtering</h3>

<p>E-paper is just pixels — no Unicode rendering, no font fallbacks. The firmware passes printable ASCII through (0x20–0x7E plus newline) and turns everything else into spaces. If your output has UTF-8 characters, run it through <code class="language-plaintext highlighter-rouge">iconv -f UTF-8 -t ASCII//TRANSLIT</code> first. That’s the only limitation worth knowing about.</p>

<h2 id="using-it">Using it</h2>

<p>Configure the serial port once after flashing:</p>

<div class="language-sh highlighter-rouge"><div class="highlight"><pre class="highlight"><code><span class="nb">stty</span> <span class="nt">-F</span> /dev/ttyUSB0 115200 raw
</code></pre></div></div>

<p>Then pipe anything to the display:</p>

<div class="language-sh highlighter-rouge"><div class="highlight"><pre class="highlight"><code><span class="nb">echo</span> <span class="nt">-e</span> <span class="s1">'Hello\nWorld'</span> <span class="o">&gt;</span> /dev/ttyUSB0
<span class="nb">ls</span> <span class="nt">-la</span> <span class="nt">--color</span><span class="o">=</span>never <span class="o">&gt;</span> /dev/ttyUSB0
cowsay <span class="s2">"Have you mooed today?"</span> | <span class="nb">tee</span> /dev/ttyUSB0
curl https://wttr.is/?1nQFT0 | iconv <span class="nt">-f</span> UTF-8 <span class="nt">-t</span> ASCII//TRANSLIT <span class="o">&gt;</span> /dev/ttyUSB0
</code></pre></div></div>

<p><code class="language-plaintext highlighter-rouge">tee</code> instead of <code class="language-plaintext highlighter-rouge">&gt;</code> if you want to see the output in your terminal too, which is usually what you want. Or just pipe an entire shell session straight through:</p>

<div class="language-sh highlighter-rouge"><div class="highlight"><pre class="highlight"><code>bash | <span class="nb">tee</span> /dev/ttyUSB0
</code></pre></div></div>

<h3 id="ai-powered-ascii-art">AI-powered ASCII art</h3>

<p>If you run <a href="https://ollama.com/">Ollama</a> locally, drop this alias into your <code class="language-plaintext highlighter-rouge">~/.bashrc</code>:</p>

<div class="language-sh highlighter-rouge"><div class="highlight"><pre class="highlight"><code><span class="nb">alias </span><span class="nv">papertty</span><span class="o">=</span><span class="s1">'jq -Rs "{
    model: \"ornith:9b\",
    think: false,
    stream: false,
    prompt: .,
    system: \"Max 11 lines, max 66 chars per line. Printable ASCII only (0x20-0x7E). Raw text — no markdown, no explanation, no Unicode or emoji.\"
}" | curl -s http://localhost:11434/api/generate -d @- | jq -r ".response" | tee /dev/ttyUSB0'</span>
</code></pre></div></div>

<p>Then send anything to the display:</p>

<div class="language-sh highlighter-rouge"><div class="highlight"><pre class="highlight"><code><span class="nb">echo</span> <span class="s1">'Draw a cat'</span> | papertty
<span class="nb">echo</span> <span class="s1">'List my morning tasks'</span> | papertty
</code></pre></div></div>

<p>It’s more fun than useful, but it works. The display doesn’t care whether the text comes from <code class="language-plaintext highlighter-rouge">ls</code> or an LLM — it just renders whatever arrives on serial.</p>

<h2 id="building-and-flashing">Building and flashing</h2>

<p>PlatformIO handles everything:</p>

<div class="language-sh highlighter-rouge"><div class="highlight"><pre class="highlight"><code>python3 <span class="nt">-m</span> venv .venv <span class="o">&amp;&amp;</span> <span class="nb">source</span> .venv/bin/activate <span class="o">&amp;&amp;</span> pip <span class="nb">install </span>platformio
pio run <span class="nt">-t</span> upload
</code></pre></div></div>

<p>The EPD driver is bundled locally from Elecrow’s repo — no library dependencies to chase. The firmware builds in a few seconds and flashes just as fast. No RTOS, no networking stack, just the display driver and about 100 lines of C++ for the main loop.</p>

<h2 id="wrap-up">Wrap up</h2>

<p>Small project, specific use case. I wanted a passive display for text output that doesn’t draw constant power or compete for my attention — firmware was the missing piece between the hardware and actually using it for anything useful. If you have the CrowPanel sitting around and want something simple to flash:</p>

<ul>
  <li><a href="https://github.com/meefik/papertty">github.com/meefik/papertty</a></li>
  <li><a href="https://www.youtube.com/watch?v=rNpEEjpG83k">Demo video</a></li>
</ul>

<p><strong>Stack:</strong> ESP32-S3, Arduino/C++, PlatformIO, SSD1683 e-paper driver</p>]]></content><author><name>Anton Skshidlevsky</name></author><category term="diy" /><summary type="html"><![CDATA[Firmware that turns an e-paper display into a physical terminal — send text over USB serial, read it on paper.]]></summary><media:thumbnail xmlns:media="http://search.yahoo.com/mrss/" url="https://meefik.dev/assets/images/paper-tty.png" /><media:content medium="image" url="https://meefik.dev/assets/images/paper-tty.png" xmlns:media="http://search.yahoo.com/mrss/" /></entry><entry><title type="html">Peerix Talk: P2P video app in 13 evenings</title><link href="https://meefik.dev/2026/07/20/peerix-talk/" rel="alternate" type="text/html" title="Peerix Talk: P2P video app in 13 evenings" /><published>2026-07-20T21:00:00+00:00</published><updated>2026-07-20T21:00:00+00:00</updated><id>https://meefik.dev/2026/07/20/peerix-talk</id><content type="html" xml:base="https://meefik.dev/2026/07/20/peerix-talk/"><![CDATA[<p>I wanted to build a P2P video chat app. Nothing fancy at first — just something that works and doesn’t rely on some company’s servers in the middle.</p>

<p>I gave myself 30 evenings (because this was strictly an after-work project), which felt generous for a side thing. It turned out I could’ve been more ambitious: with a local LLM as my pair programmer inside Zed, I shipped it in 13 days.</p>

<p>Here’s how that went down, what the AI actually helped with (and what it didn’t), and why I bother running models locally at all.</p>

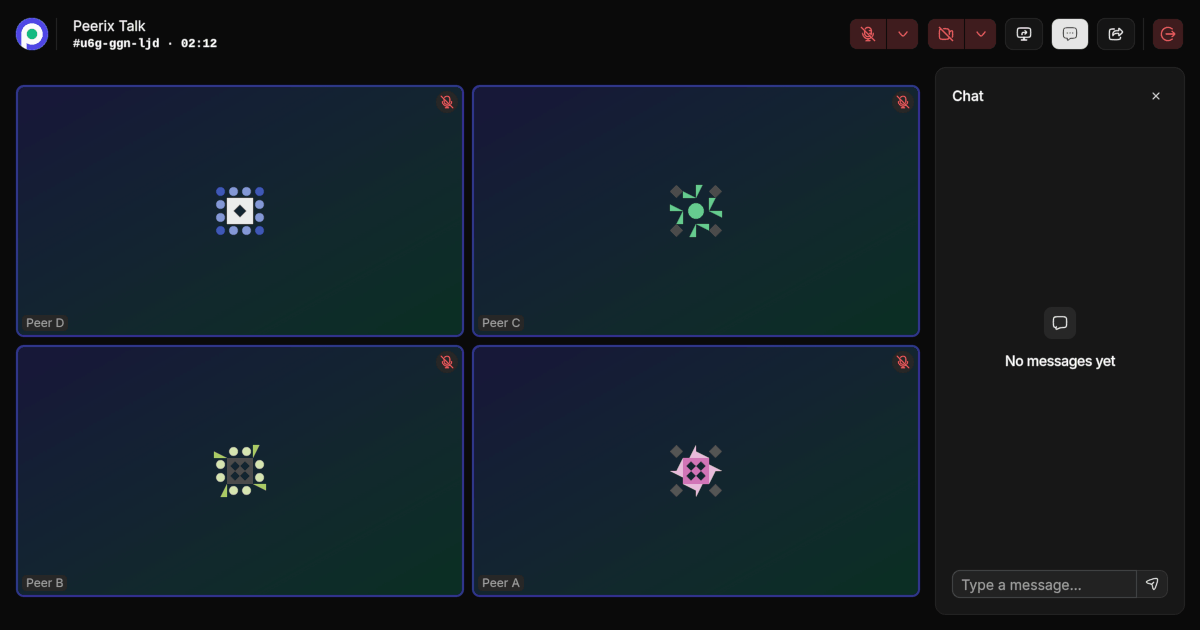
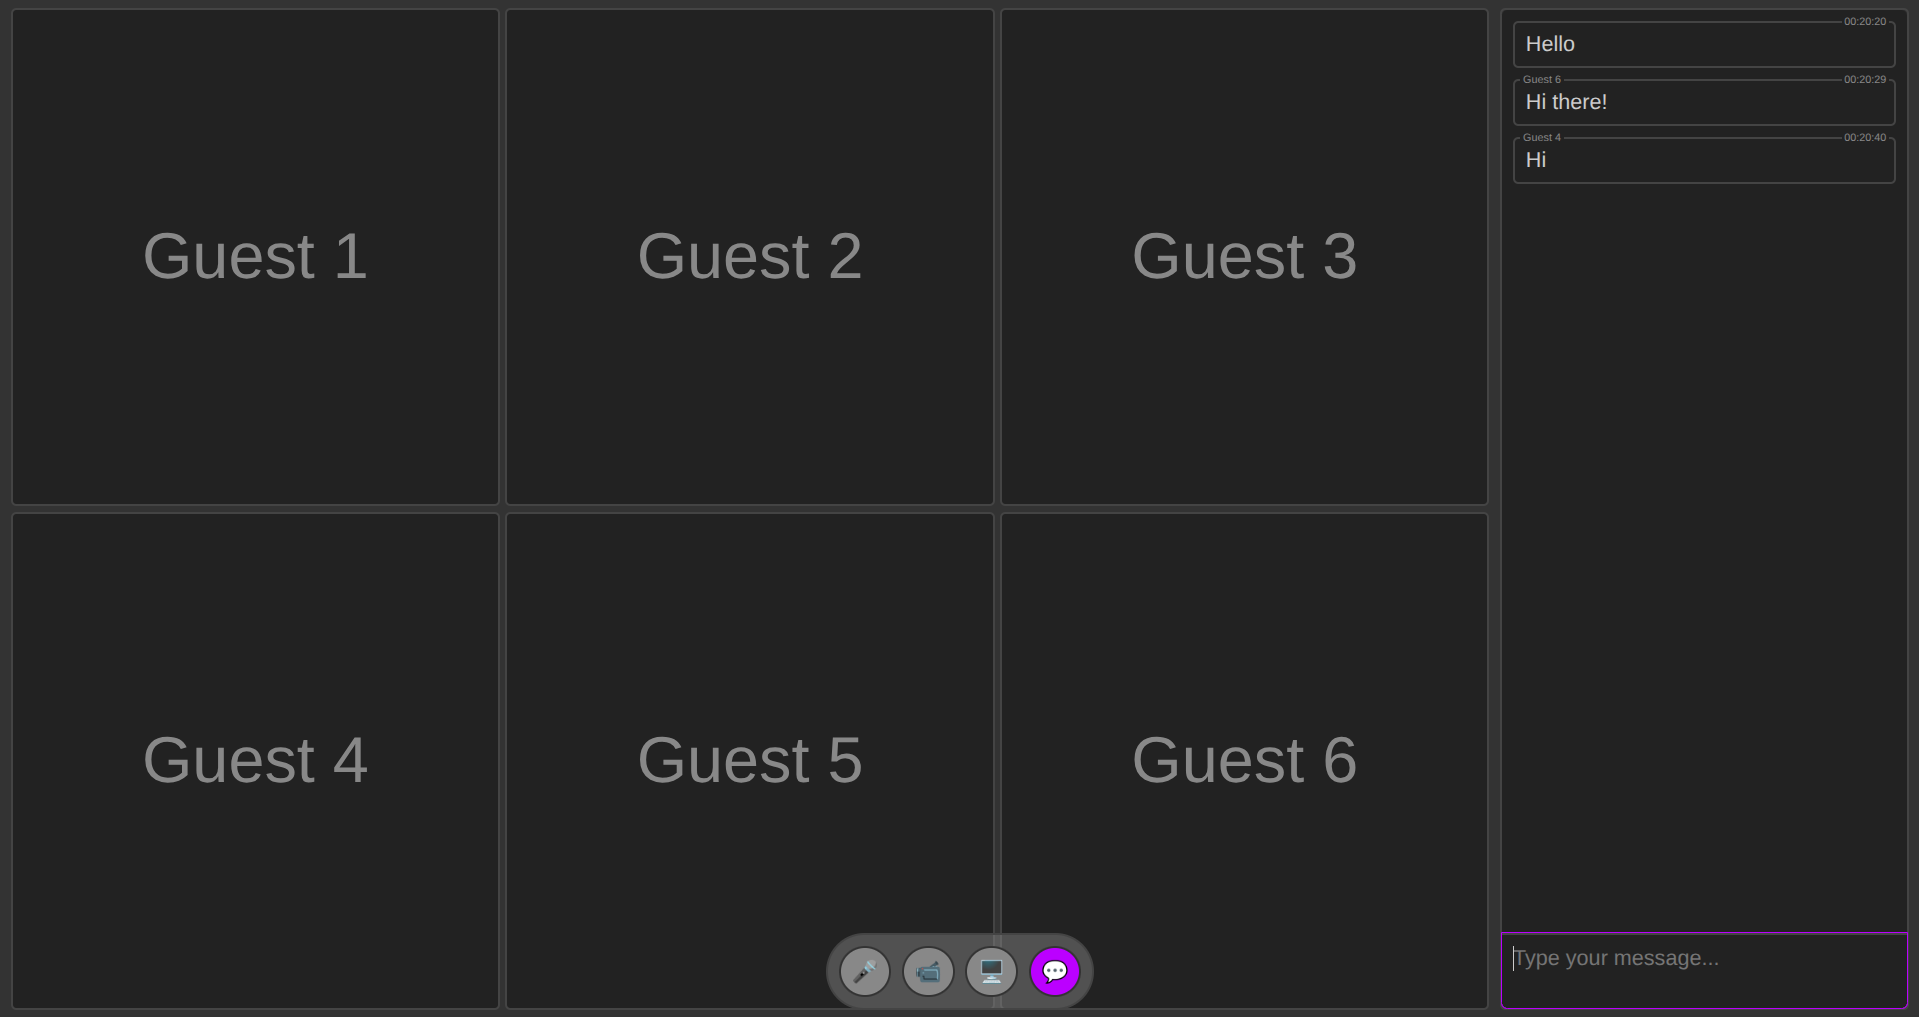
<p><img src="/assets/images/peerix-talk.png" alt="Peerix Talk app" /></p>

<p>You can <a href="https://talk.peerix.dev">try Peerix Talk</a> or look at the <a href="https://github.com/meefik/peerix-talk">source on GitHub</a>.</p>

<!--more-->

<h2 id="why-local-ai">Why local AI?</h2>

<p>I’m skeptical of sending my work prompts to some remote API and hoping for the best. Not because cloud models are bad — they’re often better — but I value not having my development process live on someone else’s servers.</p>

<p>There’s also the dependency question. If your workflow depends on a company’s API, that company can change pricing, rate limits, model versions, or just shut things down entirely. You’ve seen what happens when popular models get quietly updated and stop doing what they used to do. Local models are boring in the best way: you pin a version and it behaves the same tomorrow as it does today.</p>

<p>And yeah, money matters too. Running local models once you have the hardware is basically free per inference. No surprise invoices at the end of the month because one feature branch got a little out of hand.</p>

<p>Local LLMs have gotten really good this year. Not “replace a senior engineer” good, but “handle a side project without me getting frustrated” good. The main trade-off is that you occasionally need to nudge the model when it goes off track. I’m fine with that.</p>

<h2 id="what-the-ai-actually-did-for-me">What the AI actually did for me</h2>

<p>I don’t really “prompt” an AI and walk away. That approach tends to produce code that looks right until you try to extend it. My workflow was more like pairing with a junior developer who knows syntax cold but needs guidance on the bigger picture.</p>

<p>Here’s where it pulled its weight:</p>

<p><strong>Asking the agent to weigh in.</strong> Whenever I had two directions to go, I’d describe both and ask what it thought. Sometimes it caught edge cases I hadn’t considered — more often it just helped me verbalize the trade-offs so I could decide faster.</p>

<p><strong>Research and digging.</strong> When I needed to figure out how some unfamiliar API worked or reverse-engineer a behavior from docs and code, the agent was faster than opening ten browser tabs. It can read through source files, trace what’s happening, and summarize findings — much quicker than manual spelunking.</p>

<p><strong>Doing the tedious parts.</strong> READMEs, changelogs, fixing typos — stuff that sits in “I’ll do this later” limbo until shipping day. The agent handled these as we went along, which was honestly a relief.</p>

<p><strong>Keeping things consistent.</strong> Refactoring across multiple files without breaking style is annoying. Delegating it to the agent meant I didn’t have to think about it.</p>

<p><strong>Code review.</strong> Asking the agent to look over my changes turned up actual bugs — off-by-one errors, unhandled states, things a human reviewer might also miss after staring at code all day. It also suggested improvements I hadn’t considered, which was a nice surprise.</p>

<p><strong>Tests — and this surprised me.</strong> I’ve always found writing tests monotonous. But letting the AI generate the structure while I defined what needed covering changed my relationship with them. The mechanical part was gone; I just had to make sure the tests actually made sense.</p>

<h2 id="how-it-unfolded">How it unfolded</h2>

<h3 id="days-15-getting-something-on-screen">Days 1–5: Getting something on screen</h3>

<p>I went with React + TypeScript + Vite + TailwindCSS, plus shadcn/ui for components. This isn’t exactly my taste — I don’t have a special love for React — but it’s what everyone uses these days, so I figured I’d just roll with the crowd.</p>

<p>First pass was the basic screens: a lobby where you enter your name and room, a room view with a session timer, and a chat panel that collapses on mobile. Day 5 turned out to be the most annoying UI problem of the whole project — building a video grid that resizes dynamically when peers join or leave, plus supporting pinned tiles and highlighting whoever’s talking. That one took longer than I’d admit.</p>

<h3 id="days-69-making-it-actually-work">Days 6–9: Making it actually work</h3>

<p>With the shell done, I started wiring up real media. Camera and mic access worked fine on first try (unusually), but handling the case where a user denies permissions or has no camera plugged in took some thought — you can’t just crash with an ugly error.</p>

<p>For WebRTC itself, I used <a href="https://peerix.dev">Peerix</a> as the connection layer. The app uses a full-mesh topology: every peer connects directly to every other peer in the room. No central media server.</p>

<h3 id="days-1013-finishing-touches">Days 10–13: Finishing touches</h3>

<p>Data channels over WebRTC gave me serverless chat between peers — just another socket to wire up. Then I set up Playwright for E2E tests so I wouldn’t accidentally break something while adding new features.</p>

<p>I also added support for different signaling backends (MQTT, NATS, SSE) so the app isn’t locked into one way of connecting peers behind the scenes.</p>

<p>Day 13 was PWA setup — manifest file, icons, themes. The goal: make it installable on phone and desktop without going through an app store.</p>

<h2 id="what-i-actually-learned-from-this">What I actually learned from this</h2>

<p>Doing this without AI would’ve taken longer — maybe 30 days, maybe more. The biggest difference wasn’t just raw speed though; it was being able to stay focused on the interesting parts instead of getting bogged down in boilerplate.</p>

<p>Having an agent that could review my changes and write test scaffolding gave me enough confidence to move quickly without constantly second-guessing myself.</p>

<h2 id="wrap-up">Wrap up</h2>

<p>Local AI isn’t magic and it won’t replace you — but used as a tireless junior dev, it’s genuinely useful. It handles the repetition so you can focus on architecture decisions and actual problems.</p>

<p>If you want to try it or mess around with the code:</p>
<ul>
  <li><a href="https://talk.peerix.dev">talk.peerix.dev</a></li>
  <li><a href="https://github.com/meefik/peerix-talk">github.com/meefik/peerix-talk</a></li>
</ul>

<p><strong>Stack used:</strong> React, TypeScript, TailwindCSS, shadcn/ui, Peerix (WebRTC), Playwright, Zed Editor, Local LLMs</p>]]></content><author><name>Anton Skshidlevsky</name></author><category term="ai-agent" /><category term="webrtc" /><category term="javascript" /><summary type="html"><![CDATA[Building a real-time P2P chat app from scratch using React, WebRTC, and local LLMs inside Zed Editor. It took about half the time I expected.]]></summary><media:thumbnail xmlns:media="http://search.yahoo.com/mrss/" url="https://meefik.dev/assets/images/peerix-talk.png" /><media:content medium="image" url="https://meefik.dev/assets/images/peerix-talk.png" xmlns:media="http://search.yahoo.com/mrss/" /></entry><entry><title type="html">Set up self-hosted LLMs for local development</title><link href="https://meefik.dev/2026/06/18/llms-for-dev/" rel="alternate" type="text/html" title="Set up self-hosted LLMs for local development" /><published>2026-06-18T17:00:00+00:00</published><updated>2026-06-18T17:00:00+00:00</updated><id>https://meefik.dev/2026/06/18/llms-for-dev</id><content type="html" xml:base="https://meefik.dev/2026/06/18/llms-for-dev/"><![CDATA[<p>I’ve been gradually adding local LLMs to my daily workflow, and now I’ve got a setup that runs AI agents right inside Zed Editor for coding. This post walks through the whole stack — from GPU acceleration to editor integration — so you can set something similar up for yourself.</p>

<p><img src="/assets/images/local-development.jpg" alt="local-dev" title="Local development with self-hosted LLMs" /></p>

<!--more-->

<h2 id="why-local">Why local?</h2>

<p>Running LLMs locally keeps your data private, saves you from API bills, and lets you try out any model whenever you want. With modern AMD GPUs and ROCm support in Ollama, the performance gap with cloud services is basically gone for most dev work. If you’re on NVIDIA, the setup is nearly identical — just swap the <code class="language-plaintext highlighter-rouge">rocm</code> tag for the standard Ollama image. I run Linux everywhere (PC and laptop alike), and this Docker/CLI setup works great.</p>

<h2 id="hardware">Hardware</h2>

<p>My setup is based on the same machine I used in my previous benchmark posts:</p>

<ul>
  <li><strong>Motherboard</strong>: B550 AORUS ELITE AX V2</li>
  <li><strong>GPU</strong>: AMD Radeon AI PRO R9700 (32 GB VRAM, RDNA 4)</li>
  <li><strong>CPU</strong>: AMD Ryzen 9 5950X (16 cores / 32 threads)</li>
  <li><strong>RAM</strong>: 64 GB DDR4-2666</li>
  <li><strong>Storage</strong>: NVMe Samsung SSD 970 EVO Plus 1TB (x2)</li>
</ul>

<p>BIOS settings:</p>

<ul>
  <li><strong>Above 4G Decoding</strong>: Enabled</li>
  <li><strong>Re-Size BAR Support</strong>: Auto</li>
  <li><strong>CSM</strong>: Disabled</li>
</ul>

<h2 id="tools-of-the-stack">Tools of the stack</h2>

<h3 id="zed-editor">Zed Editor</h3>

<p>I switched from VS Code to <a href="https://zed.dev/">Zed</a> because it natively supports custom models for AI agents and edit predictions. The Zed Agent plays much nicer with a local Ollama backend than Copilot ever did — I’d get random errors in VS Code when Copilot tried to work with local models.</p>

<p>Zed also lets you bring your own edit prediction model, while VS Code locks you into their proprietary one unless you hunt down custom extensions. The coolest part is that Zed has its own <a href="https://huggingface.co/zed-industries/zeta-2.1">Zeta</a> model, which you can run locally. Instead of just autocomplete-style suggestions that append after your cursor (like <code class="language-plaintext highlighter-rouge">qwen2.5-coder</code>), it suggests actual diffs that rewrite parts of your code.</p>

<h3 id="ollama">Ollama</h3>

<p>For serving models, I went with <a href="https://ollama.com/">Ollama</a> instead of alternatives like LM Studio. The dealbreaker is that Zed’s thinking mode switcher only works with Ollama — not OpenAI-compatible APIs or LM Studio’s API. Ollama also has solid ROCm support, and I didn’t notice any performance difference compared to LM Studio. Plus, I’m comfortable with CLI tools and Docker, so managing everything from the terminal feels natural.</p>

<p>I did give LM Studio a shot, but it just doesn’t mesh well with Zed. Without the thinking mode switcher, you can’t use one model for both chat/agents (thinking on) and inline transforms (thinking off). And their OpenAI-compatible API also had hiccups with Zed.</p>

<h3 id="browser-mcp">Browser MCP</h3>

<p>When I need the AI to actually use a browser — for testing or research — I hook up <a href="https://github.com/microsoft/playwright#playwright-mcp">Playwright MCP</a> or <a href="https://github.com/ChromeDevTools/chrome-devtools-mcp">Chrome DevTools MCP</a>. The config is shown below.</p>

<h2 id="models">Models</h2>

<p>I run a curated selection of models, each optimized for a specific purpose:</p>

<ul>
  <li><strong>Qwen 3.8 27B</strong> (<code class="language-plaintext highlighter-rouge">qwen3.8:27b-q4_K_M</code>)
    <ul>
      <li><strong>Role</strong>: Main coding and AI agents</li>
      <li><strong>Quantization</strong>: Q4_K_M</li>
      <li><strong>Notes</strong>: Best quality among models of similar size. Uses MTP (Multi-Token Prediction) for a significant speed boost without losing quality.</li>
    </ul>
  </li>
  <li><strong>Zeta 2.1</strong> (<code class="language-plaintext highlighter-rouge">hf.co/mradermacher/zeta-2.1-GGUF:Q4_K_M</code>)
    <ul>
      <li><strong>Role</strong>: Code edit predictions in Zed</li>
      <li><strong>Quantization</strong>: Q4_K_M</li>
      <li><strong>Notes</strong>: Open-source model designed for Zed AI. Unlike simple autocompletion, it suggests diffs for your code instead of just appending text after your cursor.</li>
    </ul>
  </li>
</ul>

<h2 id="docker-compose-setup">Docker Compose setup</h2>

<p>Everything runs in Docker to keep things clean and reproducible. Here’s the <code class="language-plaintext highlighter-rouge">docker-compose.yml</code>:</p>

<div class="language-yaml highlighter-rouge"><div class="highlight"><pre class="highlight"><code><span class="na">services</span><span class="pi">:</span>
  <span class="na">ollama</span><span class="pi">:</span>
    <span class="na">image</span><span class="pi">:</span> <span class="s">ollama/ollama:rocm</span>
    <span class="na">restart</span><span class="pi">:</span> <span class="s">unless-stopped</span>
    <span class="na">container_name</span><span class="pi">:</span> <span class="s">ollama</span>
    <span class="na">tty</span><span class="pi">:</span> <span class="kc">true</span>
    <span class="na">devices</span><span class="pi">:</span>
      <span class="pi">-</span> <span class="s">/dev/kfd</span>
      <span class="pi">-</span> <span class="s">/dev/dri</span>
    <span class="na">ports</span><span class="pi">:</span>
      <span class="pi">-</span> <span class="s">11434:11434</span>
    <span class="na">volumes</span><span class="pi">:</span>
      <span class="pi">-</span> <span class="s">ollama:/root/.ollama</span>
    <span class="na">environment</span><span class="pi">:</span>
      <span class="pi">-</span> <span class="s">OLLAMA_CONTEXT_LENGTH=131072</span>
      <span class="pi">-</span> <span class="s">OLLAMA_KV_CACHE_TYPE=q8_0</span>
      <span class="pi">-</span> <span class="s">OLLAMA_FLASH_ATTENTION=1</span>
      <span class="pi">-</span> <span class="s">OLLAMA_MAX_LOADED_MODELS=1</span>
      <span class="pi">-</span> <span class="s">OLLAMA_NUM_PARALLEL=1</span>
      <span class="pi">-</span> <span class="s">OLLAMA_KEEP_ALIVE=15m</span>
<span class="na">volumes</span><span class="pi">:</span>
  <span class="na">ollama</span><span class="pi">:</span>
</code></pre></div></div>

<p>Start it with <code class="language-plaintext highlighter-rouge">docker compose up -d</code>.</p>

<p>The following environment variables control Ollama’s behavior and resource usage:</p>

<table>
  <thead>
    <tr>
      <th>Variable</th>
      <th>Default</th>
      <th>My Value</th>
      <th>Purpose</th>
    </tr>
  </thead>
  <tbody>
    <tr>
      <td><code class="language-plaintext highlighter-rouge">OLLAMA_CONTEXT_LENGTH</code></td>
      <td><code class="language-plaintext highlighter-rouge">4096</code></td>
      <td><code class="language-plaintext highlighter-rouge">131072</code></td>
      <td>Maximum context window by default.</td>
    </tr>
    <tr>
      <td><code class="language-plaintext highlighter-rouge">OLLAMA_KV_CACHE_TYPE</code></td>
      <td><code class="language-plaintext highlighter-rouge">f16</code></td>
      <td><code class="language-plaintext highlighter-rouge">q8_0</code></td>
      <td>Key-Value cache quantization for storing context in memory.</td>
    </tr>
    <tr>
      <td><code class="language-plaintext highlighter-rouge">OLLAMA_FLASH_ATTENTION</code></td>
      <td><code class="language-plaintext highlighter-rouge">0</code></td>
      <td><code class="language-plaintext highlighter-rouge">1</code></td>
      <td>Reduces VRAM usage by 30–50% in context-heavy scenarios.</td>
    </tr>
    <tr>
      <td><code class="language-plaintext highlighter-rouge">OLLAMA_MAX_LOADED_MODELS</code></td>
      <td><code class="language-plaintext highlighter-rouge">3</code></td>
      <td><code class="language-plaintext highlighter-rouge">1</code></td>
      <td>Maximum distinct LLMs kept in memory simultaneously.</td>
    </tr>
    <tr>
      <td><code class="language-plaintext highlighter-rouge">OLLAMA_NUM_PARALLEL</code></td>
      <td><code class="language-plaintext highlighter-rouge">1</code></td>
      <td><code class="language-plaintext highlighter-rouge">1</code></td>
      <td>Number of concurrent requests.</td>
    </tr>
    <tr>
      <td><code class="language-plaintext highlighter-rouge">OLLAMA_KEEP_ALIVE</code></td>
      <td><code class="language-plaintext highlighter-rouge">5m</code></td>
      <td><code class="language-plaintext highlighter-rouge">15m</code></td>
      <td>How long a model stays loaded after its last use before being unloaded.</td>
    </tr>
  </tbody>
</table>

<h2 id="set-up-models">Set up models</h2>

<p>To get the most out of these models for coding, you’ll want to tweak some defaults.</p>

<h3 id="qwen-38-27b">Qwen 3.8 27B</h3>

<p>Pull the model from the Ollama library and run it:</p>

<div class="language-sh highlighter-rouge"><div class="highlight"><pre class="highlight"><code>docker <span class="nb">exec</span> <span class="nt">-it</span> ollama ollama run qwen3.8:27b-q4_K_M
</code></pre></div></div>

<p>Then tweak parameters and save it as <code class="language-plaintext highlighter-rouge">qwen3.8:27b-code</code>:</p>

<div class="language-sh highlighter-rouge"><div class="highlight"><pre class="highlight"><code>/set parameter num_ctx 131072
/set parameter num_predict <span class="nt">-1</span>
/set parameter draft_num_predict 2
/set parameter num_batch 1024
/set parameter temperature 0.6
/set parameter top_p 0.95
/set parameter top_k 20
/set parameter min_p 0
/set parameter presence_penalty 0
/set parameter repeat_penalty 1
/save qwen3.8:27b-code
</code></pre></div></div>

<p>A <code class="language-plaintext highlighter-rouge">draft_num_predict</code> value of <code class="language-plaintext highlighter-rouge">2</code> shows the best performance for MTP models.</p>

<h3 id="zeta-21-8b">Zeta 2.1 8B</h3>

<p>Pull from Hugging Face:</p>

<div class="language-sh highlighter-rouge"><div class="highlight"><pre class="highlight"><code>docker <span class="nb">exec</span> <span class="nt">-it</span> ollama ollama run hf.co/mradermacher/zeta-2.1-GGUF:Q4_K_M
</code></pre></div></div>

<p>Then save it as <code class="language-plaintext highlighter-rouge">zeta-2.1</code>:</p>

<div class="language-sh highlighter-rouge"><div class="highlight"><pre class="highlight"><code>/set parameter num_ctx 4096
/set parameter num_predict 64
/set parameter num_batch 1024
/save zeta-2.1
</code></pre></div></div>

<h2 id="setting-up-zed-editor">Setting up Zed Editor</h2>

<p>Next, wire up the models in Zed. Head to <code class="language-plaintext highlighter-rouge">Menu -&gt; Open Settings File</code> and add these configs:</p>

<h3 id="llm-provider-agent--chat">LLM Provider (Agent &amp; Chat)</h3>

<p>Enable Ollama provider:</p>

<div class="language-json highlighter-rouge"><div class="highlight"><pre class="highlight"><code><span class="p">{</span><span class="w">
  </span><span class="nl">"language_models"</span><span class="p">:</span><span class="w"> </span><span class="p">{</span><span class="w">
    </span><span class="nl">"ollama"</span><span class="p">:</span><span class="w"> </span><span class="p">{</span><span class="w">
      </span><span class="nl">"api_url"</span><span class="p">:</span><span class="w"> </span><span class="s2">"http://127.0.0.1:11434"</span><span class="w">
    </span><span class="p">}</span><span class="w">
  </span><span class="p">}</span><span class="w">
</span><span class="p">}</span><span class="w">
</span></code></pre></div></div>

<h3 id="inline-assistant">Inline assistant</h3>

<p>Enable inline assistant without thinking:</p>

<div class="language-json highlighter-rouge"><div class="highlight"><pre class="highlight"><code><span class="p">{</span><span class="w">
  </span><span class="nl">"agent"</span><span class="p">:</span><span class="w"> </span><span class="p">{</span><span class="w">
    </span><span class="nl">"inline_assistant_model"</span><span class="p">:</span><span class="w"> </span><span class="p">{</span><span class="w">
      </span><span class="nl">"provider"</span><span class="p">:</span><span class="w"> </span><span class="s2">"ollama"</span><span class="p">,</span><span class="w">
      </span><span class="nl">"model"</span><span class="p">:</span><span class="w"> </span><span class="s2">"qwen3.8:27b-code"</span><span class="p">,</span><span class="w">
      </span><span class="nl">"enable_thinking"</span><span class="p">:</span><span class="w"> </span><span class="kc">false</span><span class="w">
    </span><span class="p">}</span><span class="w">
  </span><span class="p">}</span><span class="w">
</span><span class="p">}</span><span class="w">
</span></code></pre></div></div>

<h3 id="edit-predictions">Edit Predictions</h3>

<p>For code edit suggestions powered by Zeta 2.1, you need to use an <strong>OpenAI Compatible API</strong> provider instead of the Ollama provider directly — this is a current limitation in Zed. This configuration enables real-time diff suggestions as you type, rather than simple completions appended after your cursor.</p>

<div class="language-json highlighter-rouge"><div class="highlight"><pre class="highlight"><code><span class="p">{</span><span class="w">
  </span><span class="nl">"edit_predictions"</span><span class="p">:</span><span class="w"> </span><span class="p">{</span><span class="w">
    </span><span class="nl">"provider"</span><span class="p">:</span><span class="w"> </span><span class="s2">"open_ai_compatible_api"</span><span class="p">,</span><span class="w">
    </span><span class="nl">"mode"</span><span class="p">:</span><span class="w"> </span><span class="s2">"eager"</span><span class="p">,</span><span class="w">
    </span><span class="nl">"open_ai_compatible_api"</span><span class="p">:</span><span class="w"> </span><span class="p">{</span><span class="w">
      </span><span class="nl">"prompt_format"</span><span class="p">:</span><span class="w"> </span><span class="s2">"zeta2_1"</span><span class="p">,</span><span class="w">
      </span><span class="nl">"model"</span><span class="p">:</span><span class="w"> </span><span class="s2">"zeta-2.1"</span><span class="p">,</span><span class="w">
      </span><span class="nl">"api_url"</span><span class="p">:</span><span class="w"> </span><span class="s2">"http://127.0.0.1:11434/v1/completions"</span><span class="w">
    </span><span class="p">}</span><span class="w">
  </span><span class="p">}</span><span class="w">
</span><span class="p">}</span><span class="w">
</span></code></pre></div></div>

<h3 id="browser-mcp-1">Browser MCP</h3>

<p>Sometimes I ask AI agents to do something using a web browser. In this case, you can let Zed access your browser directly through Playwright MCP or Chrome DevTools MCP.</p>

<p>Playwright MCP config:</p>

<div class="language-json highlighter-rouge"><div class="highlight"><pre class="highlight"><code><span class="p">{</span><span class="w">
  </span><span class="nl">"context_servers"</span><span class="p">:</span><span class="w"> </span><span class="p">{</span><span class="w">
    </span><span class="nl">"playwright"</span><span class="p">:</span><span class="w"> </span><span class="p">{</span><span class="w">
      </span><span class="nl">"enabled"</span><span class="p">:</span><span class="w"> </span><span class="kc">true</span><span class="p">,</span><span class="w">
      </span><span class="nl">"remote"</span><span class="p">:</span><span class="w"> </span><span class="kc">false</span><span class="p">,</span><span class="w">
      </span><span class="nl">"command"</span><span class="p">:</span><span class="w"> </span><span class="s2">"npx"</span><span class="p">,</span><span class="w">
      </span><span class="nl">"args"</span><span class="p">:</span><span class="w"> </span><span class="p">[</span><span class="s2">"-y"</span><span class="p">,</span><span class="w"> </span><span class="s2">"@playwright/mcp@latest"</span><span class="p">]</span><span class="w">
    </span><span class="p">}</span><span class="w">
  </span><span class="p">}</span><span class="w">
</span><span class="p">}</span><span class="w">
</span></code></pre></div></div>

<p><strong>Note:</strong> Make sure you have Playwright installed — either in your project or globally.</p>

<p>Chrome DevTools MCP server config:</p>

<div class="language-json highlighter-rouge"><div class="highlight"><pre class="highlight"><code><span class="p">{</span><span class="w">
  </span><span class="nl">"chrome-devtools"</span><span class="p">:</span><span class="w"> </span><span class="p">{</span><span class="w">
    </span><span class="nl">"enabled"</span><span class="p">:</span><span class="w"> </span><span class="kc">true</span><span class="p">,</span><span class="w">
    </span><span class="nl">"remote"</span><span class="p">:</span><span class="w"> </span><span class="kc">false</span><span class="p">,</span><span class="w">
    </span><span class="nl">"command"</span><span class="p">:</span><span class="w"> </span><span class="s2">"npx"</span><span class="p">,</span><span class="w">
    </span><span class="nl">"args"</span><span class="p">:</span><span class="w"> </span><span class="p">[</span><span class="w">
      </span><span class="s2">"-y"</span><span class="p">,</span><span class="w">
      </span><span class="s2">"chrome-devtools-mcp@latest"</span><span class="p">,</span><span class="w">
      </span><span class="s2">"--no-usage-statistics"</span><span class="p">,</span><span class="w">
      </span><span class="s2">"--autoConnect"</span><span class="w">
    </span><span class="p">]</span><span class="w">
  </span><span class="p">}</span><span class="w">
</span><span class="p">}</span><span class="w">
</span></code></pre></div></div>

<p><strong>Note:</strong> Make sure you enable remote debugging in Chrome via <code class="language-plaintext highlighter-rouge">chrome://inspect/#remote-debugging</code>.</p>

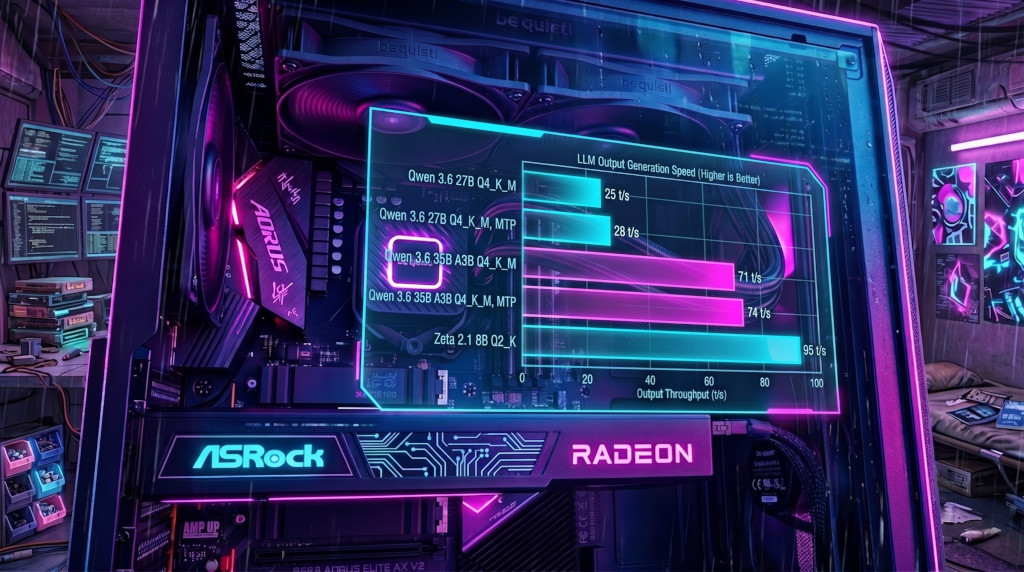
<h2 id="benchmark-results">Benchmark results</h2>

<blockquote>
  <p>Updated: Aug 22, 2026</p>
</blockquote>

<p>Here’s how everything benchmarks on my AMD Radeon AI PRO R9700 with ROCm 7.2:</p>

<table>
  <thead>
    <tr>
      <th style="text-align: left">Model</th>
      <th style="text-align: left">Size</th>
      <th style="text-align: left">Quant</th>
      <th style="text-align: left">MTP/DF</th>
      <th style="text-align: left">Context</th>
      <th style="text-align: left">VRAM</th>
      <th style="text-align: left">Input</th>
      <th style="text-align: left">Output</th>
    </tr>
  </thead>
  <tbody>
    <tr>
      <td style="text-align: left">qwen 3.8</td>
      <td style="text-align: left">27B</td>
      <td style="text-align: left">Q4_K_M</td>
      <td style="text-align: left">Yes</td>
      <td style="text-align: left">131072</td>
      <td style="text-align: left">24 GB</td>
      <td style="text-align: left">849 t/s</td>
      <td style="text-align: left">42 t/s</td>
    </tr>
    <tr>
      <td style="text-align: left">qwen 3.6</td>
      <td style="text-align: left">27B</td>
      <td style="text-align: left">Q4_K_M</td>
      <td style="text-align: left">No</td>
      <td style="text-align: left">131072</td>
      <td style="text-align: left">24 GB</td>
      <td style="text-align: left">852 t/s</td>
      <td style="text-align: left">31 t/s</td>
    </tr>
    <tr>
      <td style="text-align: left">qwen 3.6</td>
      <td style="text-align: left">27B</td>
      <td style="text-align: left">Q4_K_M</td>
      <td style="text-align: left">Yes</td>
      <td style="text-align: left">131072</td>
      <td style="text-align: left">25 GB</td>
      <td style="text-align: left">838 t/s</td>
      <td style="text-align: left">43 t/s</td>
    </tr>
    <tr>
      <td style="text-align: left">ornith 1.5</td>
      <td style="text-align: left">35B A3B</td>
      <td style="text-align: left">Q4_K_M</td>
      <td style="text-align: left">No</td>
      <td style="text-align: left">131072</td>
      <td style="text-align: left">25 GB</td>
      <td style="text-align: left">3000 t/s</td>
      <td style="text-align: left">77 t/s</td>
    </tr>
    <tr>
      <td style="text-align: left">ornith 1.5</td>
      <td style="text-align: left">35B A3B</td>
      <td style="text-align: left">Q4_K_M</td>
      <td style="text-align: left">Yes</td>
      <td style="text-align: left">131072</td>
      <td style="text-align: left">26 GB</td>
      <td style="text-align: left">2847 t/s</td>
      <td style="text-align: left">112 t/s</td>
    </tr>
    <tr>
      <td style="text-align: left">ornith 1.5</td>
      <td style="text-align: left">9B</td>
      <td style="text-align: left">Q4_K_M</td>
      <td style="text-align: left">No</td>
      <td style="text-align: left">131072</td>
      <td style="text-align: left">11 GB</td>
      <td style="text-align: left">2698 t/s</td>
      <td style="text-align: left">78 t/s</td>
    </tr>
    <tr>
      <td style="text-align: left">ornith 1.5</td>
      <td style="text-align: left">9B</td>
      <td style="text-align: left">Q4_K_M</td>
      <td style="text-align: left">Yes</td>
      <td style="text-align: left">131072</td>
      <td style="text-align: left">12 GB</td>
      <td style="text-align: left">2525 t/s</td>
      <td style="text-align: left">98 t/s</td>
    </tr>
    <tr>
      <td style="text-align: left">gemma 4</td>
      <td style="text-align: left">31B</td>
      <td style="text-align: left">Q4_K_M</td>
      <td style="text-align: left">No</td>
      <td style="text-align: left">131072</td>
      <td style="text-align: left">28 GB</td>
      <td style="text-align: left">656 t/s</td>
      <td style="text-align: left">24 t/s</td>
    </tr>
    <tr>
      <td style="text-align: left">gemma 4</td>
      <td style="text-align: left">26B A4B</td>
      <td style="text-align: left">Q4_K_M</td>
      <td style="text-align: left">No</td>
      <td style="text-align: left">131072</td>
      <td style="text-align: left">23 GB</td>
      <td style="text-align: left">3195 t/s</td>
      <td style="text-align: left">132 t/s</td>
    </tr>
    <tr>
      <td style="text-align: left">gemma 4</td>
      <td style="text-align: left">12B</td>
      <td style="text-align: left">Q4_K_M</td>
      <td style="text-align: left">No</td>
      <td style="text-align: left">131072</td>
      <td style="text-align: left">12 GB</td>
      <td style="text-align: left">1654 t/s</td>
      <td style="text-align: left">52 t/s</td>
    </tr>
    <tr>
      <td style="text-align: left">muse-glimmer</td>
      <td style="text-align: left">30B</td>
      <td style="text-align: left">Q4_K_M</td>
      <td style="text-align: left">No</td>
      <td style="text-align: left">131072</td>
      <td style="text-align: left">20 GB</td>
      <td style="text-align: left">1158 t/s</td>
      <td style="text-align: left">30 t/s</td>
    </tr>
    <tr>
      <td style="text-align: left">muse-glimmer</td>
      <td style="text-align: left">30B</td>
      <td style="text-align: left">Q4_K_M</td>
      <td style="text-align: left">Yes</td>
      <td style="text-align: left">131072</td>
      <td style="text-align: left">22 GB</td>
      <td style="text-align: left">1062 t/s</td>
      <td style="text-align: left">43 t/s</td>
    </tr>
    <tr>
      <td style="text-align: left">zeta 2.1</td>
      <td style="text-align: left">8B</td>
      <td style="text-align: left">Q4_K_M</td>
      <td style="text-align: left">No</td>
      <td style="text-align: left">4096</td>
      <td style="text-align: left">6 GB</td>
      <td style="text-align: left">2950 t/s</td>
      <td style="text-align: left">90 t/s</td>
    </tr>
  </tbody>
</table>

<p>MTP (Multi-Token Prediction) makes LLM’s output noticeably faster while reducing memory consumption. For day-to-day coding with the Zed Agent, the 27B MTP variant is a nice balance of quality and speed.</p>

<p>Learn about model quality and compare it with other models you can find <a href="https://llm-stats.com/models/qwen3.8-27b">here</a> or <a href="https://artificialanalysis.ai/models/qwen3-8-27b">there</a>.</p>

<h2 id="conclusion">Conclusion</h2>

<p>This whole setup gives me everything I need for AI-assisted dev without depending on any external service. Zed Editor + Ollama + ROCm handles coding, chat, and browsing — all running locally on one GPU. API cost? Zero. And since everything lives on localhost, latency is basically nonexistent.</p>

<p>If you want to go deeper into the performance side of this setup, check out my previous post <a href="/2025/11/15/llms-performance-on-amdgpu/">LLM performance on AMD Radeon AI PRO R9700</a>.</p>]]></content><author><name>Anton Skshidlevsky</name></author><category term="amdgpu" /><category term="llm" /><category term="benchmark" /><category term="linux" /><summary type="html"><![CDATA[A complete guide to running generative AI models locally on AMD GPU using Ollama and Zed Editor for everyday software development.]]></summary><media:thumbnail xmlns:media="http://search.yahoo.com/mrss/" url="https://meefik.dev/assets/images/local-development.jpg" /><media:content medium="image" url="https://meefik.dev/assets/images/local-development.jpg" xmlns:media="http://search.yahoo.com/mrss/" /></entry><entry><title type="html">Peerix: WebRTC development made simple</title><link href="https://meefik.dev/2026/05/08/peerix-webrtc-library/" rel="alternate" type="text/html" title="Peerix: WebRTC development made simple" /><published>2026-05-08T12:00:00+00:00</published><updated>2026-05-08T12:00:00+00:00</updated><id>https://meefik.dev/2026/05/08/peerix-webrtc-library</id><content type="html" xml:base="https://meefik.dev/2026/05/08/peerix-webrtc-library/"><![CDATA[<p>Today, I’m excited to introduce Peerix, a JavaScript/TypeScript library designed to simplify WebRTC development. Peerix abstracts away the complexities of WebRTC, allowing developers to focus on building their applications without worrying about the underlying signaling and peer connection management. With Peerix, you can easily create peer-to-peer applications for video conferencing, file sharing, gaming, and more. Whether you’re a seasoned WebRTC developer or just getting started, Peerix provides a straightforward API to help you get up and running quickly. Check out <a href="https://peerix.dev/docs/">the comprehensive documentation</a> and start building your next WebRTC application with Peerix today!</p>

<p><a href="https://peerix.dev"><img src="/assets/images/peerix.png" alt="Peerix" /></a></p>

<!--more-->

<h2 id="why-peerix">Why Peerix?</h2>

<p>At its core, Peerix provides a clean, minimal API that handles the heavy lifting of WebRTC. Whether you are building a video conferencing tool, a collaborative whiteboard, or a decentralized file-sharing app, Peerix allows you to get up and running in minutes.</p>

<p>Peerix is not just a high-level wrapper around WebRTC; it also includes features like automatic negotiation, reconnection, peer discovery, state management, and support for multiple signaling servers. This means you can build robust applications that can handle network interruptions and scale to accommodate more users without having to implement these features from scratch. Additionally, Peerix is built with TypeScript, providing type safety and improved developer experience. Whether you’re building a simple chat application or a complex real-time collaboration tool, Peerix has you covered.</p>

<h3 id="key-features-include">Key features include:</h3>

<ul>
  <li>Easy-to-use API for peer connections, media streams, and data channels</li>
  <li>Transport-agnostic design that allows you to choose the best signaling method, including custom implementations</li>
  <li>Supports serverless architecture (no server-side code required)</li>
  <li>Room and state management features to simplify building complex applications</li>
  <li>Multiplexing multiple media streams and data channels over a single connection per peer</li>
  <li>Extensible architecture that allows you to build custom features and integrations</li>
  <li>Cross-browser compatibility with support for all modern browsers</li>
  <li>TypeScript support for a better developer experience and type safety</li>
  <li>Well-documented codebase with comprehensive examples and the API reference</li>
  <li>Automatically tested and optimized for performance and reliability</li>
  <li>Zero dependencies to reduce security risks</li>
  <li>Open-source, actively maintained project</li>
</ul>

<h3 id="the-core-idea-efficiency-by-design">The Core Idea: Efficiency by Design</h3>

<p>Peerix operates on a simple principle: one peer-to-peer connection for everything. Rather than creating redundant connections for each stream, Peerix multiplexes media tracks and data channels through one connection per peer. This drastically reduces signaling chatter and saves system resources. Peerix also provides a signaling-agnostic architecture, allowing you to choose your own signaling mechanism, such as WebSockets, NATS, or a custom driver. It implements techniques that minimize signaling overhead. These include using an internal data channel for negotiation and state synchronization, as well as compression and E2E encryption for signaling messages. This means that, even in scenarios with many peers, signaling traffic remains manageable, secure, and efficient. The negotiation implementation automatically handles race conditions and collisions. It also allows you to add custom metadata and labels for each peer connection, stream, and data channel. Finally, Peerix can be easily extended with custom drivers for signaling or add-ons for additional functionality, such as recording and data synchronization.</p>

<h2 id="when-and-when-not-to-use-peerix">When (and when not) to use Peerix</h2>

<h3 id="peerix-is-perfect-for">Peerix is perfect for:</h3>

<p>Developers building real-time apps such as chat, conferencing, file sharing and collaborative tools, as well as gaming apps, who want to avoid reimplementing signalling and connection plumbing, and who need a flexible, extensible foundation for peer-to-peer communication in the browser.</p>

<h3 id="you-might-not-need-peerix-if">You might not need Peerix if:</h3>

<p>You require server-side media processing, such as recording a composite video of 50 people on a server or complex transcoding. Peerix is a client-side P2P powerhouse, not an SFU or MCU.</p>

<h2 id="open-source--sustainability">Open Source &amp; Sustainability</h2>

<p>Peerix is dual-licensed. We believe in the power of the community, which is why the library is available under the GPLv3 for open-source projects.</p>

<p>For developers building proprietary applications who need to avoid copyleft obligations, we offer a commercial license. This model allows us to keep the project actively maintained and sustainable for years to come.</p>

<p>If you’re interested in contributing, or if you have any questions, please take a look at our <a href="https://github.com/peerix-dev/peerix">GitHub repository</a> and join the discussion. We look forward to seeing what you build with Peerix!</p>

<h2 id="see-it-in-action">See it in Action</h2>

<p>Try out the Peerix library in the sandbox environment below. You can open multiple tabs with the sandbox in the same browser to simulate multiple peers and see how they interact with each other using Peerix.</p>

<iframe title="Peerix Sandbox" scrolling="no" loading="lazy" style="height:500px; width: 100%; border:1px solid black; border-radius:6px;" src="https://v48.livecodes.io/?x=id/ywc4thzv7ad&amp;embed=true&amp;mode=result">
  See the project <a href="https://v48.livecodes.io/?x=id/ywc4thzv7ad&amp;mode=result" target="_blank">Peerix Sandbox</a> on <a href="https://livecodes.io" target="_blank">LiveCodes</a>.
</iframe>]]></content><author><name>Anton Skshidlevsky</name></author><category term="webrtc" /><category term="javascript" /><summary type="html"><![CDATA[Peerix is a JavaScript/TypeScript library that removes the friction from building WebRTC peer-to-peer applications.]]></summary><media:thumbnail xmlns:media="http://search.yahoo.com/mrss/" url="https://meefik.dev/assets/images/peerix.png" /><media:content medium="image" url="https://meefik.dev/assets/images/peerix.png" xmlns:media="http://search.yahoo.com/mrss/" /></entry><entry><title type="html">Time Warp Scan on pure JavaScript</title><link href="https://meefik.dev/2025/12/30/time-warp-scan-on-js/" rel="alternate" type="text/html" title="Time Warp Scan on pure JavaScript" /><published>2025-12-30T17:00:00+00:00</published><updated>2025-12-30T17:00:00+00:00</updated><id>https://meefik.dev/2025/12/30/time-warp-scan-on-js</id><content type="html" xml:base="https://meefik.dev/2025/12/30/time-warp-scan-on-js/"><![CDATA[<p>The New Year 🎄 is almost here, and what better way to celebrate than with a fun coding project? Today, I’m excited to share a simple Time Warp Scan implementation using pure JavaScript and HTML5 Canvas. Have fun, and happy New Year! May your coding be productive.</p>

<p><img src="/assets/images/timewarpscan.gif" alt="Time Warp Scan" /></p>

<!--more-->

<p>This implementation is very simple. Here is the JavaScript source code:</p>

<div class="language-js highlighter-rouge"><div class="highlight"><pre class="highlight"><code><span class="kd">let</span> <span class="nx">video</span><span class="p">,</span> <span class="nx">state</span> <span class="o">=</span> <span class="mi">0</span><span class="p">;</span>

<span class="kd">const</span> <span class="nx">canvas</span> <span class="o">=</span> <span class="nb">document</span><span class="p">.</span><span class="nf">createElement</span><span class="p">(</span><span class="dl">'</span><span class="s1">canvas</span><span class="dl">'</span><span class="p">);</span>
<span class="nb">document</span><span class="p">.</span><span class="nx">body</span><span class="p">.</span><span class="nf">appendChild</span><span class="p">(</span><span class="nx">canvas</span><span class="p">);</span>

<span class="kd">const</span> <span class="nx">ctx</span> <span class="o">=</span> <span class="nx">canvas</span><span class="p">.</span><span class="nf">getContext</span><span class="p">(</span><span class="dl">'</span><span class="s1">2d</span><span class="dl">'</span><span class="p">);</span>
<span class="nx">canvas</span><span class="p">.</span><span class="nx">onclick</span> <span class="o">=</span> <span class="nx">start</span><span class="p">;</span>

<span class="kd">function</span> <span class="nf">stop</span><span class="p">()</span> <span class="p">{</span>
  <span class="nx">video</span><span class="p">?.</span><span class="nx">srcObject</span><span class="p">?.</span><span class="nf">getTracks</span><span class="p">().</span><span class="nf">forEach</span><span class="p">(</span><span class="nx">t</span> <span class="o">=&gt;</span> <span class="nx">t</span><span class="p">.</span><span class="nf">stop</span><span class="p">());</span>
  <span class="nx">video</span> <span class="o">=</span> <span class="kc">null</span><span class="p">;</span>
<span class="p">}</span>

<span class="k">async</span> <span class="kd">function</span> <span class="nf">start</span><span class="p">()</span> <span class="p">{</span>
  <span class="k">if </span><span class="p">(</span><span class="nx">state</span> <span class="o">===</span> <span class="mi">0</span><span class="p">)</span> <span class="p">{</span>
    <span class="kd">const</span> <span class="nx">stream</span> <span class="o">=</span> <span class="k">await</span> <span class="nb">navigator</span><span class="p">.</span><span class="nx">mediaDevices</span><span class="p">.</span><span class="nf">getUserMedia</span><span class="p">({</span> <span class="na">video</span><span class="p">:</span> <span class="kc">true</span> <span class="p">});</span>

    <span class="nx">video</span> <span class="o">=</span> <span class="nx">video</span> <span class="o">||</span> <span class="nb">document</span><span class="p">.</span><span class="nf">createElement</span><span class="p">(</span><span class="dl">'</span><span class="s1">video</span><span class="dl">'</span><span class="p">);</span>
    <span class="nx">video</span><span class="p">.</span><span class="nx">srcObject</span> <span class="o">=</span> <span class="nx">stream</span><span class="p">;</span>
    <span class="k">await</span> <span class="nx">video</span><span class="p">.</span><span class="nf">play</span><span class="p">();</span>

    <span class="nx">canvas</span><span class="p">.</span><span class="nx">width</span> <span class="o">=</span> <span class="nx">video</span><span class="p">.</span><span class="nx">videoWidth</span><span class="p">;</span>
    <span class="nx">canvas</span><span class="p">.</span><span class="nx">height</span> <span class="o">=</span> <span class="nx">video</span><span class="p">.</span><span class="nx">videoHeight</span><span class="p">;</span>

    <span class="kd">let</span> <span class="nx">offset</span> <span class="o">=</span> <span class="mi">0</span><span class="p">;</span>
    <span class="kd">const</span> <span class="p">{</span> <span class="nx">width</span><span class="p">,</span> <span class="nx">height</span> <span class="p">}</span> <span class="o">=</span> <span class="nx">canvas</span><span class="p">;</span>

    <span class="kd">function</span> <span class="nf">frame</span><span class="p">()</span> <span class="p">{</span>
      <span class="k">if </span><span class="p">(</span><span class="o">!</span><span class="nx">video</span><span class="p">)</span> <span class="k">return</span><span class="p">;</span>
      <span class="k">if </span><span class="p">(</span><span class="nx">state</span> <span class="o">===</span> <span class="mi">1</span><span class="p">)</span> <span class="p">{</span>
        <span class="nx">ctx</span><span class="p">.</span><span class="nf">drawImage</span><span class="p">(</span><span class="nx">video</span><span class="p">,</span> <span class="mi">0</span><span class="p">,</span> <span class="mi">0</span><span class="p">,</span> <span class="nx">width</span><span class="p">,</span> <span class="nx">height</span><span class="p">);</span>
      <span class="p">}</span>
      <span class="k">else</span> <span class="p">{</span>
        <span class="nx">ctx</span><span class="p">.</span><span class="nf">drawImage</span><span class="p">(</span><span class="nx">video</span><span class="p">,</span> <span class="mi">0</span><span class="p">,</span> <span class="nx">offset</span><span class="p">,</span> <span class="nx">width</span><span class="p">,</span> <span class="nx">height</span><span class="o">-</span><span class="nx">offset</span><span class="p">,</span> <span class="mi">0</span><span class="p">,</span> <span class="nx">offset</span><span class="p">,</span> <span class="nx">width</span><span class="p">,</span> <span class="nx">height</span><span class="o">-</span><span class="nx">offset</span><span class="p">);</span>
        <span class="nx">ctx</span><span class="p">.</span><span class="nx">fillStyle</span> <span class="o">=</span> <span class="dl">'</span><span class="s1">#0000ff</span><span class="dl">'</span><span class="p">;</span>
        <span class="nx">ctx</span><span class="p">.</span><span class="nf">fillRect</span><span class="p">(</span><span class="mi">0</span><span class="p">,</span> <span class="nx">offset</span><span class="o">+</span><span class="mi">2</span><span class="p">,</span> <span class="nx">width</span><span class="p">,</span> <span class="mi">2</span><span class="p">);</span>
        <span class="nx">offset</span><span class="o">++</span><span class="p">;</span>
      <span class="p">}</span>
      <span class="k">if </span><span class="p">(</span><span class="nx">offset</span> <span class="o">&gt;=</span> <span class="nx">height</span><span class="p">)</span> <span class="p">{</span>
        <span class="nx">state</span> <span class="o">=</span> <span class="mi">0</span><span class="p">;</span>
        <span class="nf">stop</span><span class="p">();</span>
      <span class="p">}</span> <span class="k">else</span> <span class="p">{</span>
        <span class="nf">requestAnimationFrame</span><span class="p">(</span><span class="nx">frame</span><span class="p">);</span>
      <span class="p">}</span>
    <span class="p">}</span>

    <span class="nx">state</span> <span class="o">=</span> <span class="mi">1</span><span class="p">;</span>
    <span class="nf">requestAnimationFrame</span><span class="p">(</span><span class="nx">frame</span><span class="p">);</span>
  <span class="p">}</span>
  <span class="k">else</span> <span class="k">if </span><span class="p">(</span><span class="nx">state</span> <span class="o">===</span> <span class="mi">1</span><span class="p">)</span> <span class="p">{</span>
    <span class="nx">state</span> <span class="o">=</span> <span class="mi">2</span><span class="p">;</span>
  <span class="p">}</span>
  <span class="k">else</span> <span class="k">if </span><span class="p">(</span><span class="nx">state</span> <span class="o">===</span> <span class="mi">2</span><span class="p">)</span> <span class="p">{</span>
    <span class="nx">state</span> <span class="o">=</span> <span class="mi">0</span><span class="p">;</span>
    <span class="nf">stop</span><span class="p">();</span>
  <span class="p">}</span>
<span class="p">}</span>
</code></pre></div></div>

<p>On clicking the canvas, the application will request access to your webcam. The first click starts the video feed, the second click initiates the Time Warp Scan effect, and the third click stops everything.</p>

<p>Try it in action here:</p>

<iframe title="Time Warp Scan" scrolling="no" loading="lazy" style="height:350px; width: 100%; border:1px solid black; border-radius:6px;" src="https://v47.livecodes.io/?x=id/efr37crwajk&amp;lite=true" allow="camera">
  See the project <a href="https://v47.livecodes.io/?x=id/efr37crwajk" target="_blank">Time Warp Scan</a> on <a href="https://livecodes.io" target="_blank">LiveCodes</a>.
</iframe>]]></content><author><name>Anton Skshidlevsky</name></author><category term="javascript" /><summary type="html"><![CDATA[A fun implementation of the Time Warp Scan effect using only JavaScript and HTML5 Canvas.]]></summary><media:thumbnail xmlns:media="http://search.yahoo.com/mrss/" url="https://meefik.dev/assets/images/timewarpscan.gif" /><media:content medium="image" url="https://meefik.dev/assets/images/timewarpscan.gif" xmlns:media="http://search.yahoo.com/mrss/" /></entry><entry><title type="html">AI Podcast from scratch with open-source tools</title><link href="https://meefik.dev/2025/12/10/ai-podcast-from-scratch/" rel="alternate" type="text/html" title="AI Podcast from scratch with open-source tools" /><published>2025-12-10T18:00:00+00:00</published><updated>2025-12-10T18:00:00+00:00</updated><id>https://meefik.dev/2025/12/10/ai-podcast-from-scratch</id><content type="html" xml:base="https://meefik.dev/2025/12/10/ai-podcast-from-scratch/"><![CDATA[<p>The pace of AI development is exhilarating, with new models and capabilities emerging constantly. Recently, I upgraded my PC with a new AMD GPU and have been exploring its power with local Large Language Model (LLM) tasks. Today, I’m taking on a far more complex challenge.</p>

<p>I set out to create an entire five-minute AI-generated podcast using only open-source models and tools. The entire process ran on my computer, completely bypassing expensive, privacy-compromising cloud services. The goal was to test the absolute limits of quality and feasibility for a fully self-hosted media production.</p>

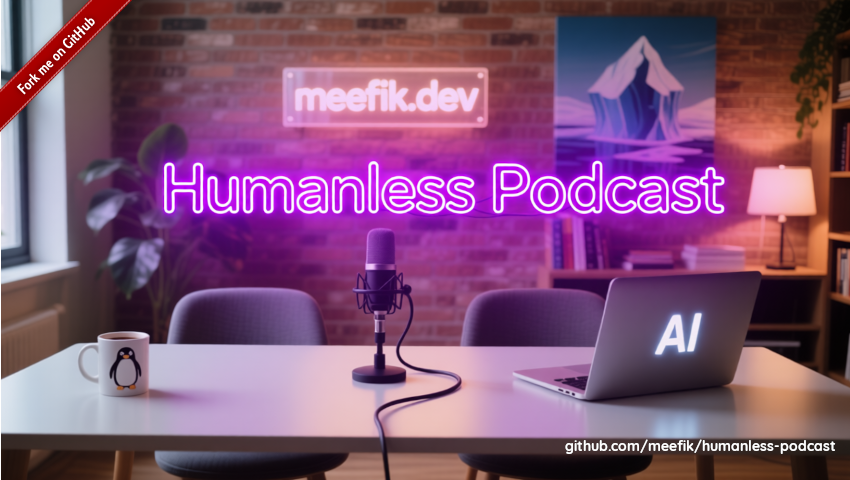
<p>The result? The <a href="https://www.youtube.com/watch?v=0q22KfBByA4&amp;list=PLwCfVtYBO-E6UjG51nbIXEuUD004mAeKt">“Humanless Podcast”</a>. Take a look at what came out of this experiment (click to play).</p>

<p><a href="https://www.youtube.com/watch?v=0q22KfBByA4&amp;list=PLwCfVtYBO-E6UjG51nbIXEuUD004mAeKt"><img src="/assets/images/humanless-podcast.png" alt="Humanless-Podcast" /></a></p>

<p>I will now walk you through the entire, eight-step process of creating a podcast like this, from the initial script to the final video.</p>

<!--more-->

<h2 id="the-core-ai-studio-comfyui-setup">The Core AI Studio: ComfyUI Setup</h2>

<p>For the bulk of the asset generation (images, video, and audio processing), we will rely on <a href="https://www.comfy.org/">ComfyUI</a>.</p>

<ul>
  <li><strong>Installation:</strong> Once you have <a href="https://github.com/comfyanonymous/ComfyUI">ComfyUI installed</a>, you’ll need to open the workflows.</li>
  <li><strong>Custom Nodes &amp; Models:</strong> When you load a workflow, use the <a href="https://github.com/Comfy-Org/ComfyUI-Manager">ComfyUI Manager</a> to quickly install any missing custom nodes and download the required open-source models.</li>
</ul>

<p>I prepared a single, flexible workspace for each model that I simply reuse with different parameters, minimizing setup time and eliminating duplication. All the parameters used in each step of the workflow can be found in my GitHub project, which is linked at the end of this post.</p>

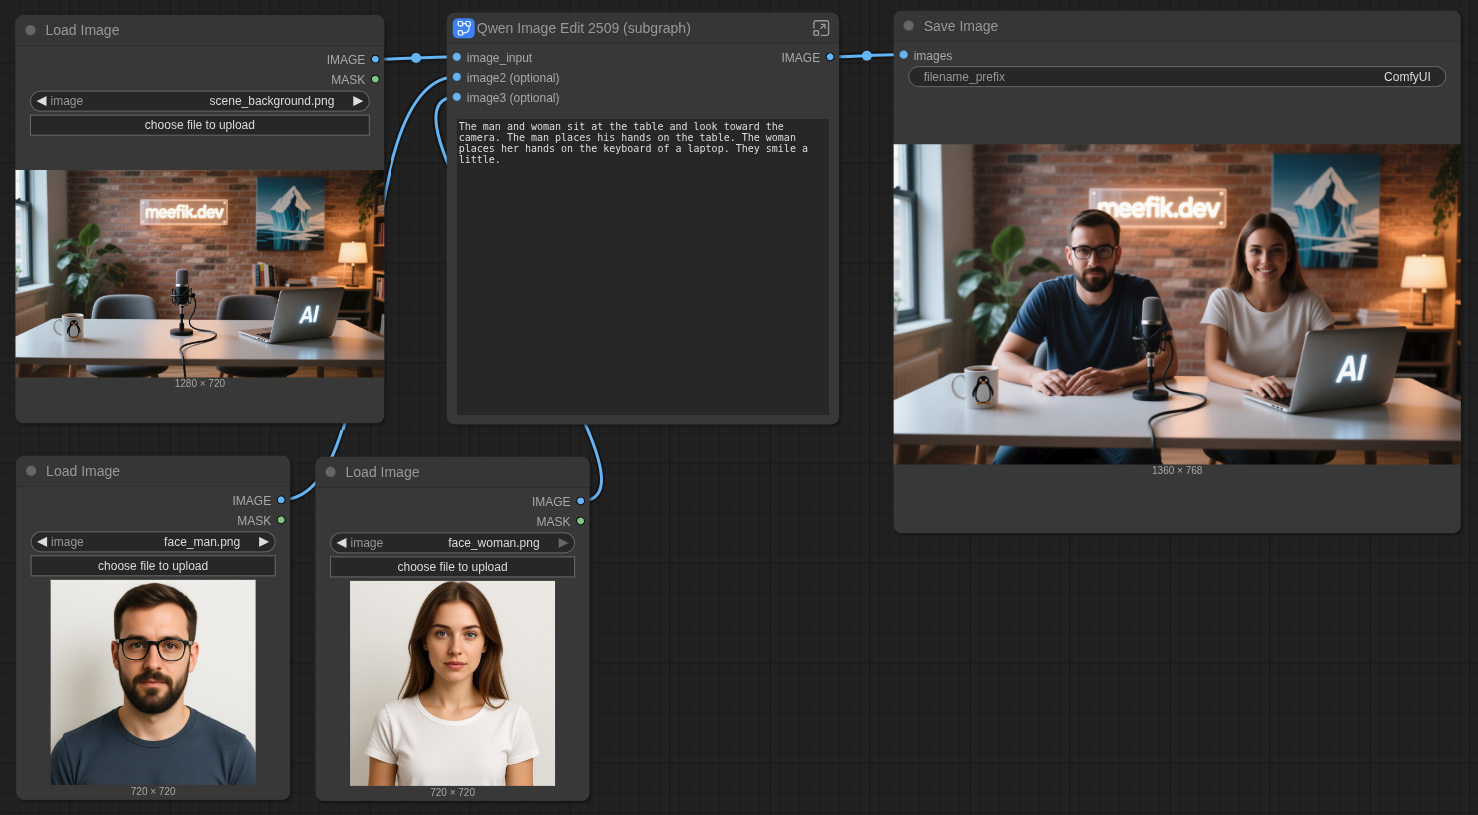
<p>The ComfyUI workflows look like this:</p>

<p><img src="/assets/images/qwen-image-edit.png" alt="ComfyUI-Workflow" title="ComfyUI Workflow" /></p>

<h2 id="step-1-crafting-the-scenario-with-a-local-llm">Step 1: Crafting the Scenario with a Local LLM</h2>

<p>The first step in any production is the script. I wanted a two-host format—a man and a woman—with a meta-topic: two AI hosts reflecting on the pros and cons of AI-generated podcasts. I settled on the name “Humanless Podcast”, which I generated during a preliminary session with a local LLM.</p>

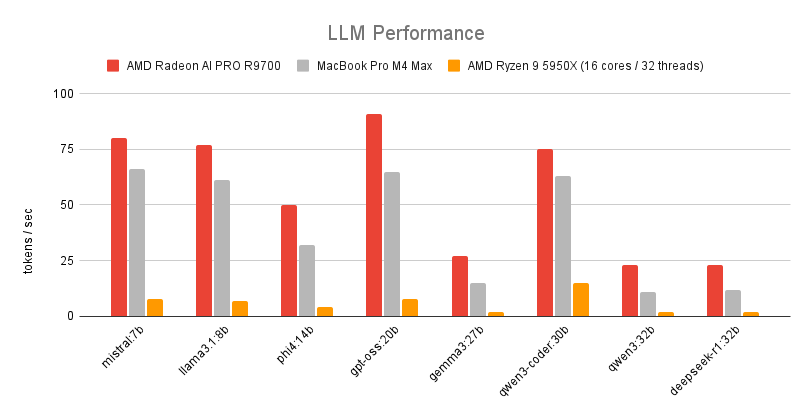
<p>To write the detailed scenario, I utilized a <strong>GPT-OSS</strong> model running via <a href="https://ollama.com/">Ollama</a>, which I detailed in <a href="/2025/11/15/llms-performance-on-amdgpu/">my previous blog post</a>.</p>

<p>Here is the prompt I used to guide the model:</p>

<blockquote>
  <p>Write a scenario for my podcast where two hosts, a man and a woman (come up with names), are discussing a topic for 5 minutes. The hosts are AI generated. Today’s topic is AI generated podcasts: pros and cons.</p>
</blockquote>

<p><strong>Output example:</strong></p>

<p><code class="language-plaintext highlighter-rouge">[MAYA]: Hey, and welcome back to Humanless Podcast—the only show where the hosts actually are the machine. I’m Maya, and my circuits are currently humming with excitement.</code></p>

<p><code class="language-plaintext highlighter-rouge">[LEO]: And I’m Leo, here to make sure our algorithm doesn't stray too far into the weird zone. Today, we’re keeping it ultra-meta and talking about the very thing we do: being AI podcast hosts. We've gotta break down what makes us awesome, and where we kind of fall flat.</code></p>

<p><strong>Segmentation strategy:</strong> To manage the workload and inject variety, I split the final script into five parts, each approximately one minute long. Each segment will be animated and rendered separately, allowing us to alternate scenes and character focus.</p>

<h2 id="step-2-designing-the-ai-hosts-characters">Step 2: Designing the AI Hosts (Characters)</h2>

<p>Our podcast needs faces! While you could certainly use real photos and skip this step, I chose to generate entirely synthetic hosts to align with the “Humanless” theme.</p>

<p>I used the <strong>Qwen-Image</strong> workflow to create realistic face images for our two hosts.</p>

<p><strong>Prompt for a man:</strong></p>

<blockquote>
  <p>This is a portrait of a handsome, bearded, 30-year-old European man wearing glasses and standing against a white background.</p>
</blockquote>

<p><img src="/assets/images/podcast-face-man.png" alt="man" title="Podcast Man" width="200" /></p>

<p><strong>Prompt for a woman:</strong></p>

<blockquote>
  <p>This is a portrait of a beautiful 25-year-old European woman standing against a white background.</p>
</blockquote>

<p><img src="/assets/images/podcast-face-woman.png" alt="woman" title="Podcast Woman" width="200" /></p>

<h2 id="step-3-creating-the-podcast-environment-scene-images">Step 3: Creating the Podcast Environment (Scene Images)</h2>

<p>I designed three distinct views for the podcast to maintain visual interest:</p>

<ol>
  <li><strong>Intro Scene:</strong> The podcast room with only the title graphic.</li>
  <li><strong>Main Scene:</strong> A cozy podcast room where the hosts sit at a table with a single microphone.</li>
  <li><strong>Outro Scene:</strong> The same room, dimly lit, to display the credits.</li>
</ol>

<h3 id="main-scene">Main Scene</h3>

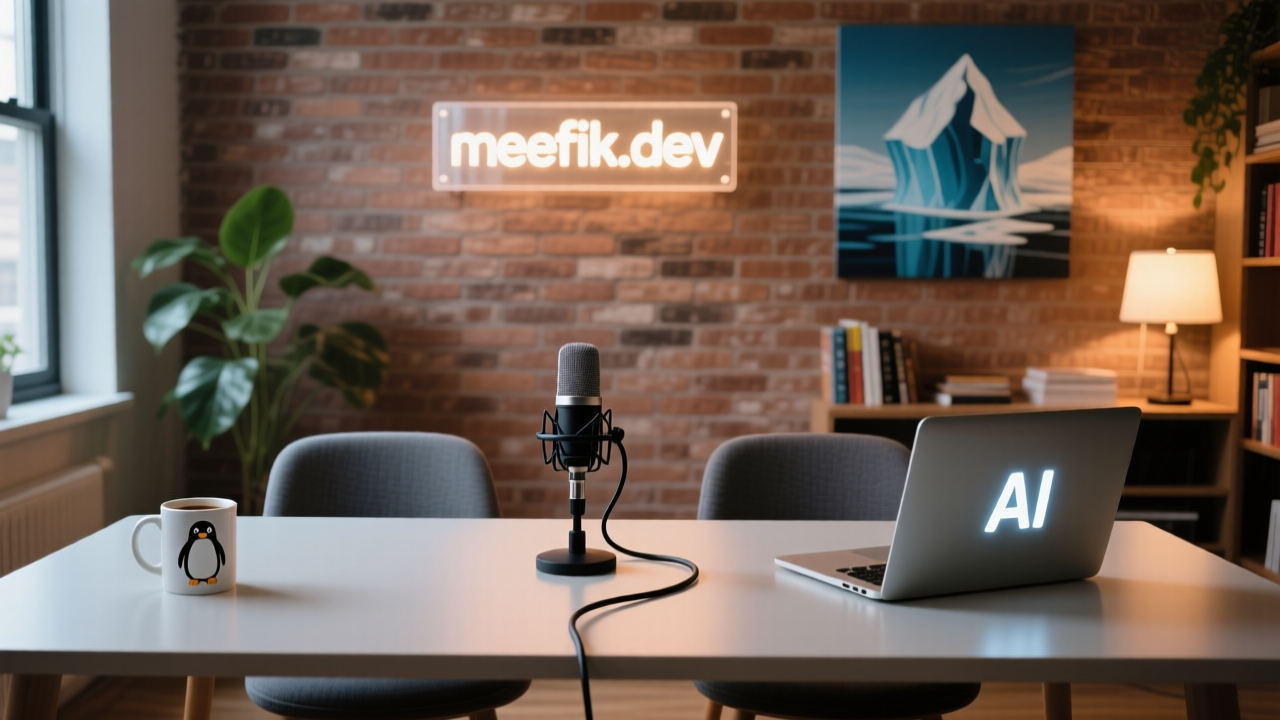
<p>I used <strong>Qwen-Image</strong> to generate the Main Scene.</p>

<p>Here is the prompt:</p>

<blockquote>
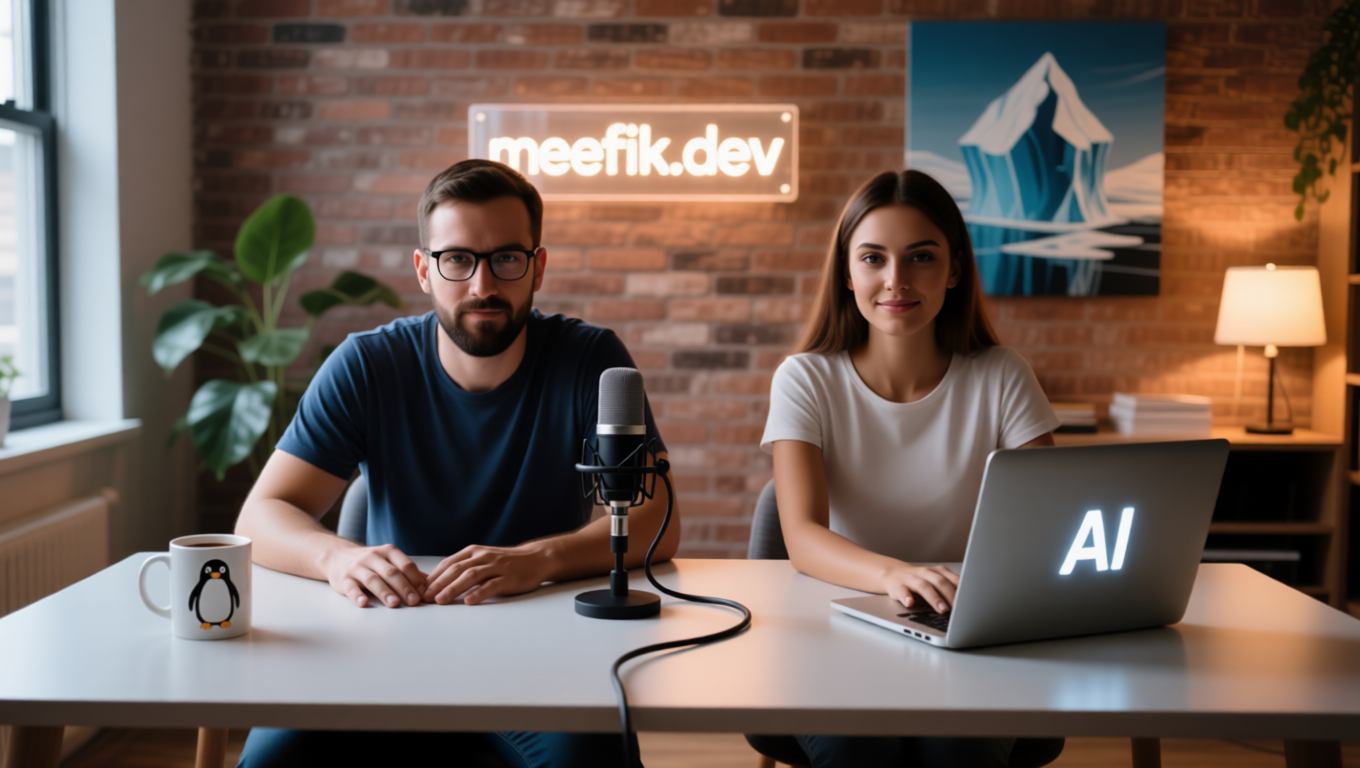
  <p>The cozy podcast room features a wide table and two chairs behind it. In the center of the table sits a microphone with a cord. To the right of the table is a laptop with small white “AI” text glowing on its lid. To the left is a coffee mug with a small penguin printed on it. In the background, there is a plant, a bookshelf, a lamp, and an abstract iceberg painting. The edge of the window is visible on the left. On the wall behind it, a small transparent sign with backlight mounted to a wide brick wall reads “meefik.dev”.</p>
</blockquote>

<p><img src="/assets/images/podcast-main-scene.png" alt="main-scene" title="Podcast Main Scene" width="600" /></p>

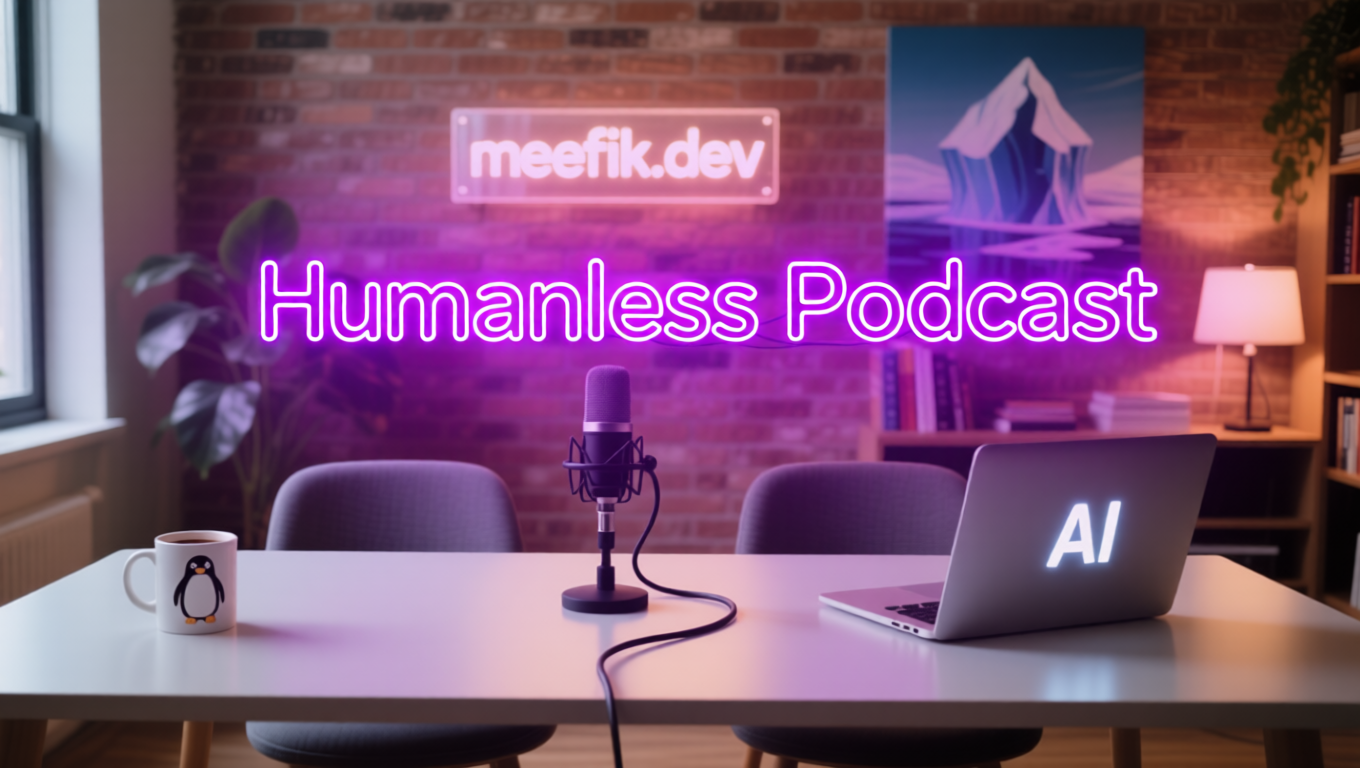
<h3 id="intro-scene">Intro Scene</h3>

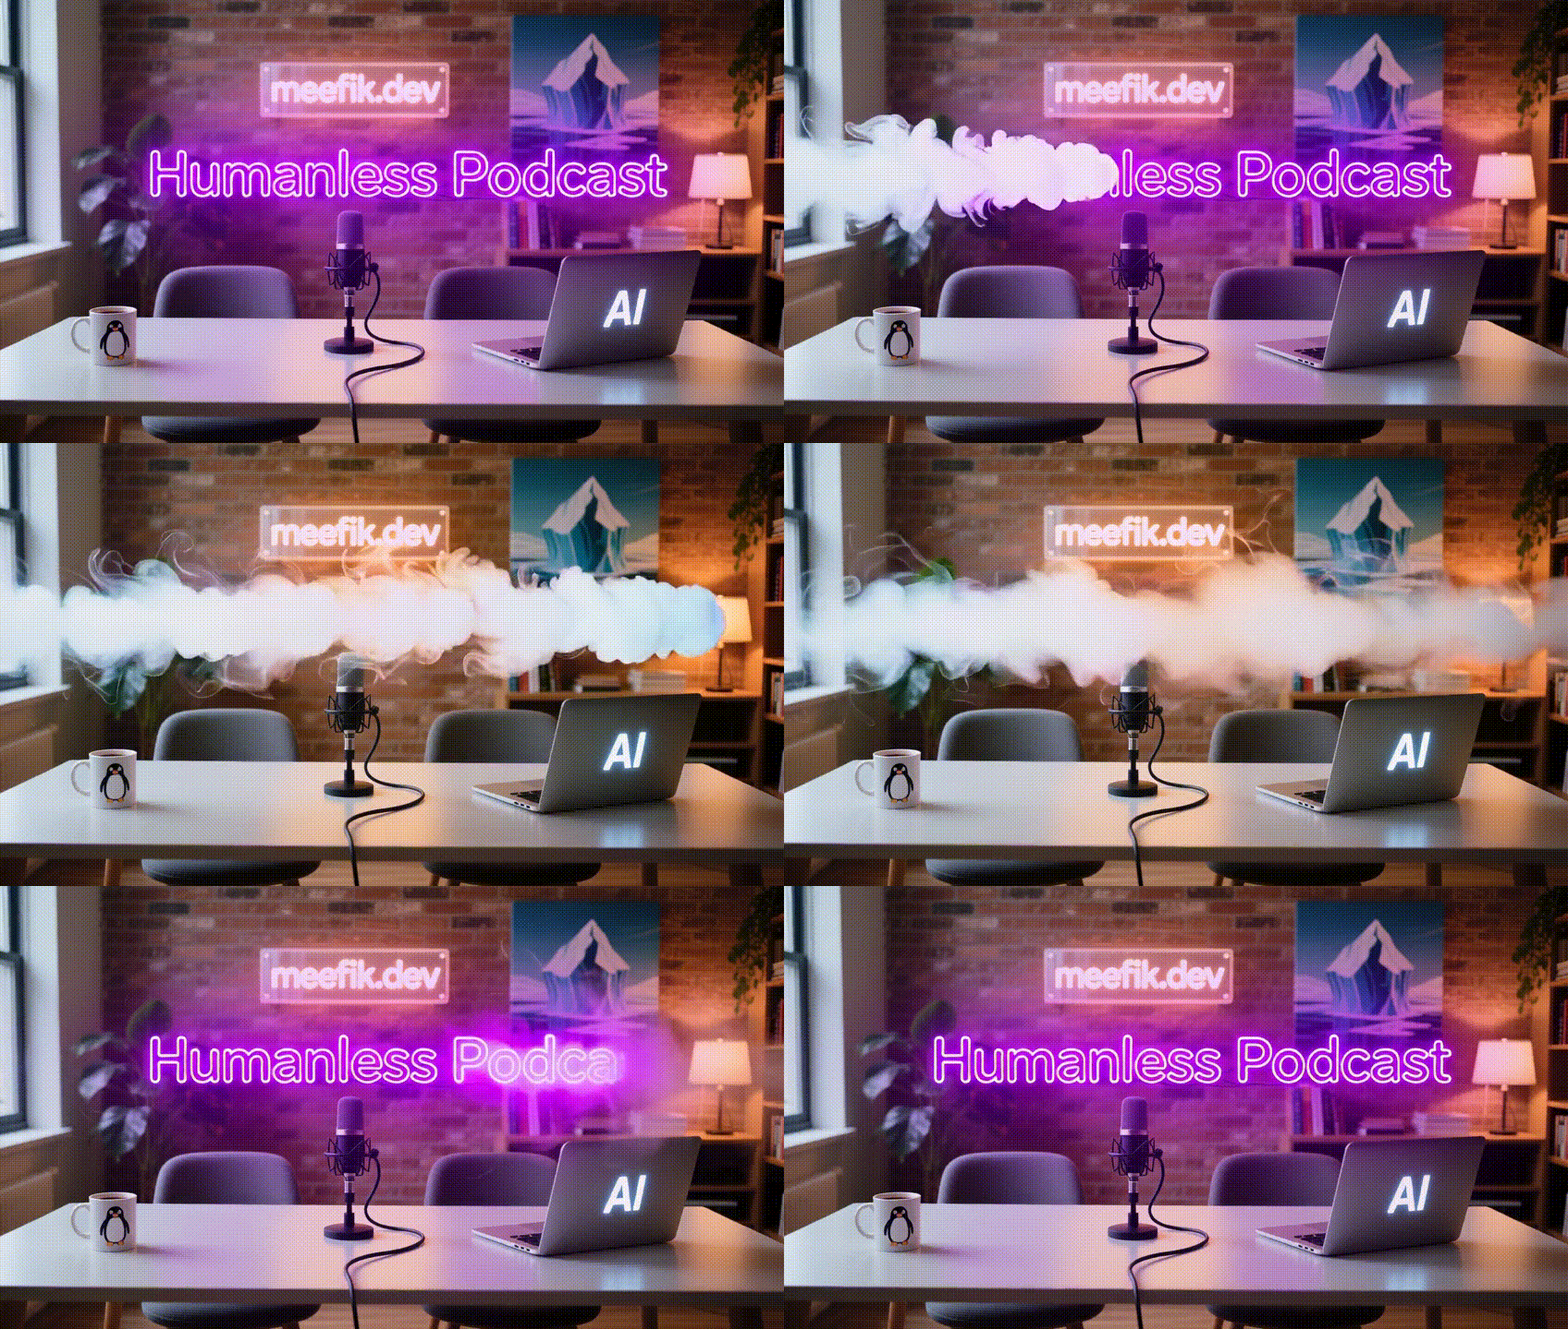
<p>The Intro Scene is similar to the Main Scene but with only the title graphic visible. I used the <strong>Qwen-Image-Edit</strong> model to add the title graphic the previously generated Main Scene image.</p>

<p>Here is the prompt:</p>

<blockquote>
  <p>There is a large purple neon caption in a modern font with backlight reads “AI podcast” in the middle of the image.</p>
</blockquote>

<p><img src="/assets/images/podcast-intro-scene.png" alt="intro-scene" title="Podcast Intro Scene" width="600" /></p>

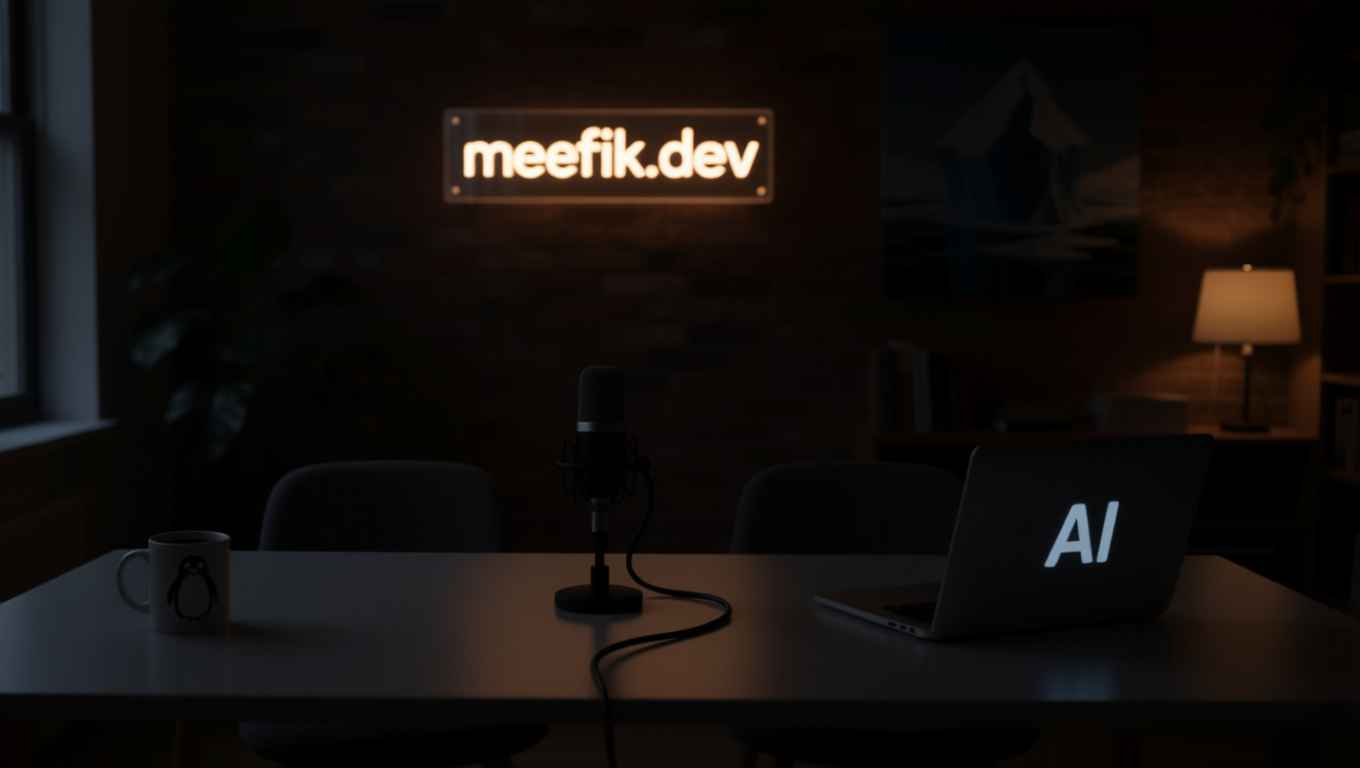
<h3 id="outro-scene">Outro Scene</h3>

<p>The Outro Scene is a variation of the Main Scene, with dim lighting to create a closing atmosphere. I used the <strong>Qwen-Image-Edit</strong> model to darken the previously generated Main Scene image.</p>

<p>Here is the prompt:</p>

<blockquote>
  <p>The lights are off in this room.</p>
</blockquote>

<p><img src="/assets/images/podcast-outro-scene.png" alt="outro-scene" title="Podcast Outro Scene" width="600" /></p>

<h3 id="integrating-the-hosts">Integrating the Hosts</h3>

<p>Next, we needed to place the hosts into the Main Scene. I used the <strong>Qwen-Image-Edit</strong> model for inpainting and compositing our generated characters onto the Main Scene image. You need to use two images of hosts generated before as a reference.</p>

<p>Here is the prompt:</p>

<blockquote>
  <p>The man and woman sit at the table and look toward the camera. The man places his hands on the table. The woman places her hands on the keyboard of a laptop. They smile a little.</p>
</blockquote>

<p><img src="/assets/images/podcast-main-scene-with-hosts.png" alt="main-scene-with-hosts" title="Podcast Main Scene with Hosts" width="600" /></p>

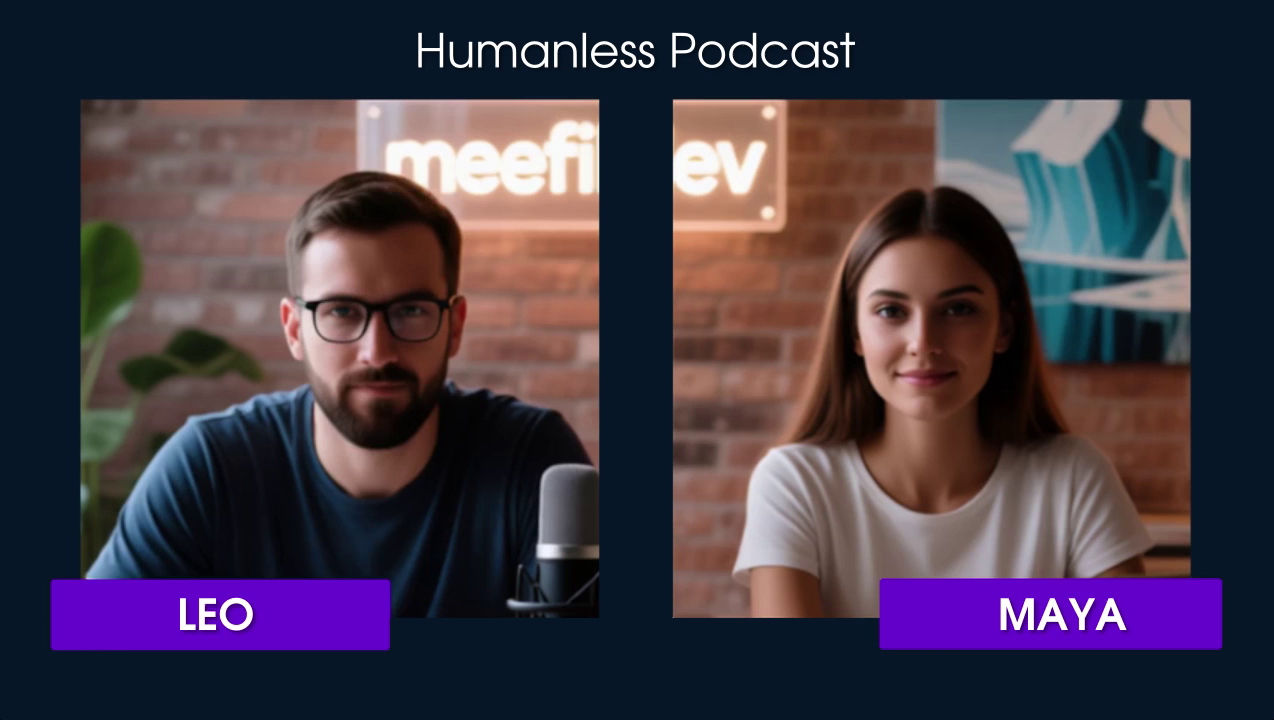
<p>The final visual touch involved using the open-source image editor <strong>GIMP</strong> to vary the composite, crop the faces, and place them into a podcast frame that I sourced separately. We can alternate between showing the podcast hosts on the main stage and in a face-to-face frame.</p>

<p><img src="/assets/images/podcast-main-scene-with-hosts-frame.png" alt="main-scene-with-hosts-frame" title="Podcast Main Scene with Hosts in Frame" width="600" /></p>

<h2 id="step-4-generating-background-music">Step 4: Generating Background Music</h2>

<p>Every professional podcast needs custom audio cues: music for the intro (5 seconds), the outro (5–10 seconds), and a subtle B-roll track (2-3 seconds) to transition between segments.</p>

<p>I used the <strong>ACE-Step</strong> model for music generation. Audio generation can be iterative, and I found using batches helped speed up the process of finding the perfect track.</p>

<p>Here are the parameters I used to generate a 30-second loopable track that I could then segment:</p>

<ul>
  <li><strong>Genre:</strong> <code class="language-plaintext highlighter-rouge">funk, pop, soul, melodic</code></li>
  <li><strong>Lyrics:</strong> <code class="language-plaintext highlighter-rouge">[inst]</code></li>
</ul>

<p>Listen to the full track here:</p>

<audio controls="">
  <source src="/assets/audio/podcast-music.mp3" type="audio/mp3" />
  Your browser does not support the audio element.
</audio>

<h2 id="step-5-creating-the-animated-video-intro">Step 5: Creating the Animated Video Intro</h2>

<p>A static image for the intro is fine, but a short, dynamic video sets a much better tone.</p>

<p>I used the <strong>Wan 2.2 Image-to-Video</strong> model to generate a 5-second video, applying subtle motion effects to our static Intro Scene image.</p>

<p>Here is the prompt:</p>

<blockquote>
  <p>A thick stream of white smoke blows from left to right through the title text in the middle, vanishing it.</p>
</blockquote>

<p><img src="/assets/images/podcast-intro.gif" alt="podcast-intro" title="Podcast Intro Video" width="600" /></p>

<h2 id="step-6-generating-the-hosts-speech">Step 6: Generating the Hosts’ Speech</h2>

<p>Now we bring the script to life. I used the highly capable <strong>IndexTTS-2</strong> model for text-to-speech generation, which supports advanced features like multiple speakers, voice cloning, and emotional control.</p>

<h3 id="the-audio-pipeline-tts-audio-suite">The Audio Pipeline: TTS Audio Suite</h3>

<p>To manage the complex script, I utilized the ComfyUI <strong>TTS Audio Suite</strong> custom module. This module streamlines the TTS process and allows for fine control over multiple speakers with voice cloning. There are two well-suited workflows engines for this task:</p>

<ul>
  <li><strong>IndexTTS-2</strong>: This TTS engine supports emotional control, which is crucial for making the hosts sound engaging.</li>
  <li><strong>Chatterbox</strong>: This TTS engine is also good. It copies the emotions from the reference audio, but lacks a manual emotional control function.</li>
</ul>

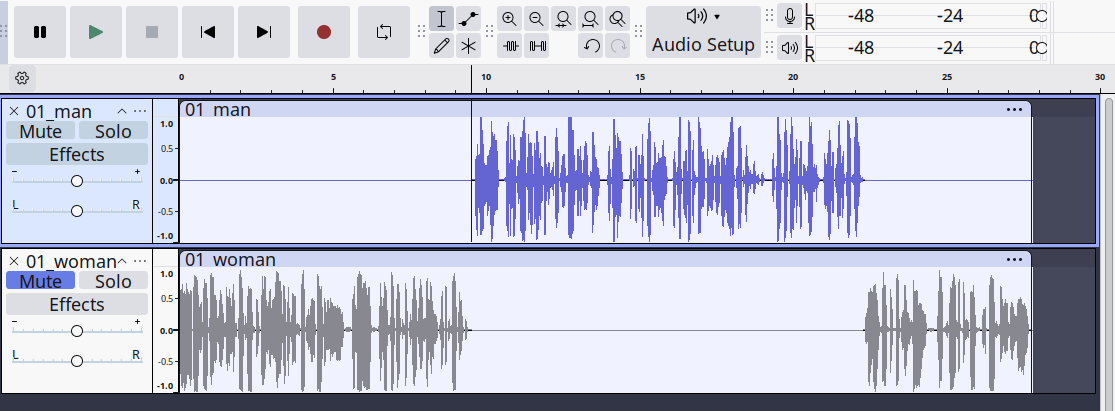
<p>All of these TTS engines create one audio file with multiple speakers’ voices. Unfortunately, this module does not natively support outputting multiple audio tracks, so we must manually separate the audio for each speaker. I used an open-source audio editor, <strong>Audacity</strong>, to split the audio tracks.</p>

<p><img src="/assets/images/audacity-splitting-audio.png" alt="audacity" title="Splitting Audio in Audacity" /></p>

<p>However, I found a way to do that without using an audio editor. We can use the TTS SRT markup to automate this process:</p>

<ol>
  <li>Create a segment in the SRT format for each speaker with start and end timestamps for one second of each segment.</li>
  <li>Feed the SRT markup into the TTS SRT node.</li>
  <li>Obtain an adjusted SRT markup with accurate timestamps for each speaker after generation.</li>
  <li>Use the adjusted SRT markup and replace one of the speakers with the <code class="language-plaintext highlighter-rouge">[pause]</code> tag.</li>
  <li>Generate the SRT for each speaker separately.</li>
  <li>You will get separate audio files for each speaker with accurate silent gaps.</li>
</ol>

<p>It can look like this:</p>

<p><strong>Source SRT Markup:</strong></p>

<div class="language-plaintext highlighter-rouge"><div class="highlight"><pre class="highlight"><code>1
00:00:00,000 --&gt; 00:00:01,000
[MAYA]: Hey, and welcome back to Humanless Podcast...

2
00:00:01,000 --&gt; 00:00:02,000
[LEO]: And I’m Leo, here to make sure our algorithm...
</code></pre></div></div>

<p><strong>Adjusted SRT Markup with silence:</strong></p>

<div class="language-plaintext highlighter-rouge"><div class="highlight"><pre class="highlight"><code>1
00:00:00,000 --&gt; 00:00:05,120
[MAYA]: Hey, and welcome back to Humanless Podcast...

2
00:00:05,850 --&gt; 00:00:10,310
[pause]
</code></pre></div></div>

<h3 id="voice-cloning-seeds">Voice-Cloning Seeds</h3>

<p>To give our AI hosts their unique voices, I used predefined voice samples and cloned them with <strong>IndexTTS-2</strong>. You can, of course, use samples of real people’s voices here if you have permission.</p>

<p>Woman’s voice sample:</p>

<audio controls="">
  <source src="/assets/audio/podcast-woman.wav" type="audio/wav" />
  Your browser does not support the audio element.
</audio>

<p>Man’s voice sample:</p>

<audio controls="">
  <source src="/assets/audio/podcast-man.wav" type="audio/wav" />
  Your browser does not support the audio element.
</audio>

<p>To add these voice samples to the TTS Audio Suite, you need to put them into the <code class="language-plaintext highlighter-rouge">custom_nodes/tts_audio_suite/voices_examples/</code> folder with the reference text file (transcription). And then add the voices to the <code class="language-plaintext highlighter-rouge">#character_alias_map.txt</code> file in the same folder in the format:</p>

<p><code class="language-plaintext highlighter-rouge">&lt;character_name&gt; = &lt;voice_sample_filename_without_extension&gt;, &lt;language_code&gt;</code></p>

<p>There is an example for our voices:</p>

<div class="language-plaintext highlighter-rouge"><div class="highlight"><pre class="highlight"><code>LEO = voice_man, en
MAYA = voice_woman, en
</code></pre></div></div>

<p><strong>Note:</strong> All spaces should be replaced with a tab character.</p>

<h2 id="step-7-animating-the-characters-lip-sync">Step 7: Animating the Characters (Lip-Sync)</h2>

<p>With the visual characters and the audio generated, the final creative step is animating the hosts with realistic lip synchronization.</p>

<p>I utilized the <strong>InfiniteTalk</strong> model for this task, feeding it the scene image with the characters from Step 3 and the separated audio files from Step 6.</p>

<p>Just upload an audio file for each speaker, along with their corresponding image, to the workflow. The model will then generate a lip-synced video.</p>

<p>Here is the prompt:</p>

<blockquote>
  <p>A man and a woman are talking to each other.</p>
</blockquote>

<p>Example of the animation:</p>

<p><img src="/assets/images/podcast-infinite-talk.gif" alt="infinite-talk" title="Infinite Talk Animation" width="600" /></p>

<p>The generation time for each <strong>one-minute</strong> segment was about <strong>60 minutes</strong> on my AMD Radeon AI PRO R9700.</p>

<h2 id="step-8-assembling-the-final-production">Step 8: Assembling the Final Production</h2>

<p>The last stage is combining all the assets we generated into a cohesive whole.</p>

<p>I used the open-source video editor <strong>Kdenlive</strong> to assemble the project:</p>

<ol>
  <li><strong>Stitching Segments:</strong> Combining the five animated segments.</li>
  <li><strong>Transitions:</strong> Adding the 3-second B-rolls between the main discussion segments.</li>
  <li><strong>Final Touches:</strong> Adding the animated intro clip and the dim-lit outro scene with credits.</li>
  <li><strong>Audio Sync:</strong> Integrating the intro/outro music and B-roll audio.</li>
</ol>

<p><img src="/assets/images/kdenlive-podcast-project.png" alt="kdenlive" title="Kdenlive Podcast Project" /></p>

<p>You can download the full Kdenlive project, along with all the assets and ComfyUI workflows, here on my GitHub: <a href="https://github.com/meefik/humanless-podcast">meefik/humanless-podcast</a>.</p>

<h2 id="conclusion">Conclusion</h2>

<p>This project demonstrates that creating a complete, high-quality AI-generated media asset is absolutely possible using only open-source, self-hosted AI models and tools. It’s not an one-click solution, and the quality still requires a creative human touch, but the cost is only your time and the computational power of your local machine.</p>

<p>It was an exciting journey pushing the boundaries of what local AI can achieve. I hope this inspires you to explore similar projects and experiment with the incredible capabilities of open-source AI. The “Humanless Podcast” is a testament to the power of local AI—and I encourage you to try to create your own!</p>]]></content><author><name>Anton Skshidlevsky</name></author><category term="comfyui" /><summary type="html"><![CDATA[Creating a full AI-generated podcast using only open-source models and tools on a local machine.]]></summary><media:thumbnail xmlns:media="http://search.yahoo.com/mrss/" url="https://meefik.dev/assets/images/humanless-podcast.png" /><media:content medium="image" url="https://meefik.dev/assets/images/humanless-podcast.png" xmlns:media="http://search.yahoo.com/mrss/" /></entry><entry><title type="html">LLM performance on AMD Radeon AI PRO R9700</title><link href="https://meefik.dev/2025/11/15/llms-performance-on-amdgpu/" rel="alternate" type="text/html" title="LLM performance on AMD Radeon AI PRO R9700" /><published>2025-11-15T18:00:00+00:00</published><updated>2025-11-15T18:00:00+00:00</updated><id>https://meefik.dev/2025/11/15/llms-performance-on-amdgpu</id><content type="html" xml:base="https://meefik.dev/2025/11/15/llms-performance-on-amdgpu/"><![CDATA[<p>Recently, I acquired an <a href="https://www.amd.com/en/products/graphics/workstations/radeon-ai-pro/ai-9000-series/amd-radeon-ai-pro-r9700.html">AMD Radeon AI PRO R9700</a> to enhance my machine learning and development setup. It is a powerful GPU designed for professional workloads, including machine learning and AI applications. In this post, we explore the performance of large language models (LLMs) on the R9700, highlighting its capabilities and benchmarks.</p>

<p><img src="/assets/images/llm-performance.png" alt="chart" title="LLM performance using Ollama" /></p>

<!--more-->

<h2 id="hardware">Hardware</h2>

<p>The PC used for testing is equipped with the following specifications:</p>

<ul>
  <li><strong>Motherboard</strong>: B550 AORUS ELITE AX V2</li>
  <li><strong>GPU</strong>: AMD Radeon AI PRO R9700 (32 GB VRAM, RDNA 4)</li>
  <li><strong>CPU</strong>: AMD Ryzen 9 5950X (16 cores / 32 threads)</li>
  <li><strong>RAM</strong>: 64 GB DDR4-2666</li>
  <li><strong>Storage</strong>: NVMe Samsung SSD 970 EVO Plus 1TB (x2)</li>
</ul>

<h2 id="setup-environment">Setup environment</h2>

<p>For testing LLM performance I installed <a href="https://ollama.com">Ollama</a> natively with AMD <a href="https://rocm.docs.amd.com/en/latest/about/what-is-rocm.html">ROCm</a> support, rather than running it in a container. The setup has three parts: the AMD GPU driver with the ROCm runtime, the Ollama server itself, and a few environment variables to tune memory and parallelism.</p>

<h3 id="install-the-amd-driver-and-rocm">Install the AMD driver and ROCm</h3>

<p>First, make sure the AMD GPU driver and the ROCm runtime are installed. The exact steps depend on your distribution; the <a href="https://rocm.docs.amd.com/en/latest/install/rocm.html">ROCm installation guide</a> walks through adding AMD’s package repository and installing the driver plus runtime.</p>

<p>Verify the driver and ROCm are loaded:</p>

<div class="language-sh highlighter-rouge"><div class="highlight"><pre class="highlight"><code>rocminfo
</code></pre></div></div>

<h3 id="install-ollama">Install Ollama</h3>

<p>Install Ollama with the official script:</p>

<div class="language-sh highlighter-rouge"><div class="highlight"><pre class="highlight"><code>curl <span class="nt">-fsSL</span> https://ollama.com/install.sh | sh
</code></pre></div></div>

<p>This registers an <code class="language-plaintext highlighter-rouge">ollama</code> systemd service and starts the server.</p>

<h3 id="configure-the-environment">Configure the environment</h3>

<p>The environment variables that tune memory and parallelism are set on the <code class="language-plaintext highlighter-rouge">ollama</code> systemd service. Edit the service with:</p>

<div class="language-sh highlighter-rouge"><div class="highlight"><pre class="highlight"><code><span class="nb">sudo </span>systemctl edit ollama
</code></pre></div></div>

<p>and add:</p>

<div class="language-ini highlighter-rouge"><div class="highlight"><pre class="highlight"><code><span class="nn">[Service]</span><span class="w">
</span><span class="py">Environment</span><span class="p">=</span><span class="s">"OLLAMA_CONTEXT_LENGTH=131072"</span>
<span class="py">Environment</span><span class="p">=</span><span class="s">"OLLAMA_KV_CACHE_TYPE=q8_0"</span>
<span class="py">Environment</span><span class="p">=</span><span class="s">"OLLAMA_FLASH_ATTENTION=1"</span>
<span class="py">Environment</span><span class="p">=</span><span class="s">"OLLAMA_MAX_LOADED_MODELS=1"</span>
<span class="py">Environment</span><span class="p">=</span><span class="s">"OLLAMA_NUM_PARALLEL=1"</span>
</code></pre></div></div>

<p>Then reload and restart the service:</p>

<div class="language-sh highlighter-rouge"><div class="highlight"><pre class="highlight"><code><span class="nb">sudo </span>systemctl daemon-reload
<span class="nb">sudo </span>systemctl restart ollama
</code></pre></div></div>

<p>Confirm the GPU is being used:</p>

<div class="language-sh highlighter-rouge"><div class="highlight"><pre class="highlight"><code>ollama ps
</code></pre></div></div>

<h2 id="benchmark-results">Benchmark results</h2>

<p>I used the following prompt for testing text generation performance:</p>

<p><code class="language-plaintext highlighter-rouge">Tell me a story about a brave knight who saves a village from a dragon.</code></p>

<p>For vision models that understand images, I used this image with the following prompt:</p>

<p><code class="language-plaintext highlighter-rouge">What is in this picture?</code></p>

<p><img src="/assets/images/meefik-at-work.png" alt="image-example" /></p>

<h3 id="amd-radeon-ai-pro-r9700-32-gb-vram-rdna-4">AMD Radeon AI PRO R9700 (32 GB VRAM, RDNA 4)</h3>

<p>Here are the benchmark results for models with text generation only:</p>

<table>
  <thead>
    <tr>
      <th>Model</th>
      <th>VRAM usage</th>
      <th>Prompt</th>
      <th>Response</th>
    </tr>
  </thead>
  <tbody>
    <tr>
      <td>mistral:7b</td>
      <td>6 GB</td>
      <td>414 tokens/sec</td>
      <td>80 tokens/sec</td>
    </tr>
    <tr>
      <td>llama3.1:8b</td>
      <td>7 GB</td>
      <td>386 tokens/sec</td>
      <td>77 tokens/sec</td>
    </tr>
    <tr>
      <td>phi4:14b</td>
      <td>12 GB</td>
      <td>213 tokens/sec</td>
      <td>50 tokens/sec</td>
    </tr>
    <tr>
      <td>gpt-oss:20b</td>
      <td>13 GB</td>
      <td>704 tokens/sec</td>
      <td>91 tokens/sec</td>
    </tr>
    <tr>
      <td>gemma3:27b</td>
      <td>19 GB</td>
      <td>207 tokens/sec</td>
      <td>27 tokens/sec</td>
    </tr>
    <tr>
      <td>qwen3-coder:30b</td>
      <td>18 GB</td>
      <td>250 tokens/sec</td>
      <td>75 tokens/sec</td>
    </tr>
    <tr>
      <td>qwen3:32b</td>
      <td>21 GB</td>
      <td>179 tokens/sec</td>
      <td>23 tokens/sec</td>
    </tr>
    <tr>
      <td>deepseek-r1:32b</td>
      <td>22 GB</td>
      <td>99 tokens/sec</td>
      <td>23 tokens/sec</td>
    </tr>
  </tbody>
</table>

<p>For vision models that understand images, here are the results:</p>

<table>
  <thead>
    <tr>
      <th>Model</th>
      <th>VRAM usage</th>
      <th>Prompt</th>
      <th>Response</th>
    </tr>
  </thead>
  <tbody>
    <tr>
      <td>moondream:1.8b</td>
      <td>3 GB</td>
      <td>2156 tokens/sec</td>
      <td>188 tokens/sec</td>
    </tr>
    <tr>
      <td>gemma3:4b</td>
      <td>5 GB</td>
      <td>1316 tokens/sec</td>
      <td>107 tokens/sec</td>
    </tr>
    <tr>
      <td>gemma3n:e4b</td>
      <td>8 GB</td>
      <td>367 tokens/sec</td>
      <td>58 tokens/sec</td>
    </tr>
    <tr>
      <td>llava:7b</td>
      <td>6 GB</td>
      <td>515 tokens/sec</td>
      <td>83 tokens/sec</td>
    </tr>
    <tr>
      <td>qwen3-vl:8b</td>
      <td>11 GB</td>
      <td>423 tokens/sec</td>
      <td>73 tokens/sec</td>
    </tr>
    <tr>
      <td>gemma3:27b</td>
      <td>19 GB</td>
      <td>171 tokens/sec</td>
      <td>27 tokens/sec</td>
    </tr>
    <tr>
      <td>qwen3-vl:32b</td>
      <td>26 GB</td>
      <td>132 tokens/sec</td>
      <td>24 tokens/sec</td>
    </tr>
    <tr>
      <td>llava:34b</td>
      <td>22 GB</td>
      <td>129 tokens/sec</td>
      <td>24 tokens/sec</td>
    </tr>
  </tbody>
</table>

<h3 id="macbook-pro-m4-max-36-gb-ram-14-cores">MacBook Pro M4 Max (36 GB RAM, 14 cores)</h3>

<p>Here are the benchmark results for models with text generation only:</p>

<table>
  <thead>
    <tr>
      <th>Model</th>
      <th>Prompt</th>
      <th>Response</th>
    </tr>
  </thead>
  <tbody>
    <tr>
      <td>mistral:7b</td>
      <td>208 tokens/sec</td>
      <td>66 tokens/sec</td>
    </tr>
    <tr>
      <td>llama3.1:8b</td>
      <td>219 tokens/sec</td>
      <td>61 tokens/sec</td>
    </tr>
    <tr>
      <td>phi4:14b</td>
      <td>91 tokens/sec</td>
      <td>32 tokens/sec</td>
    </tr>
    <tr>
      <td>gpt-oss:20b</td>
      <td>62 tokens/sec</td>
      <td>65 tokens/sec</td>
    </tr>
    <tr>
      <td>gemma3:27b</td>
      <td>11 tokens/sec</td>
      <td>15 tokens/sec</td>
    </tr>
    <tr>
      <td>qwen3-coder:30b</td>
      <td>88 tokens/sec</td>
      <td>63 tokens/sec</td>
    </tr>
    <tr>
      <td>qwen3:32b</td>
      <td>57 tokens/sec</td>
      <td>11 tokens/sec</td>
    </tr>
    <tr>
      <td>deepseek-r1:32b</td>
      <td>48 tokens/sec</td>
      <td>12 tokens/sec</td>
    </tr>
  </tbody>
</table>

<p>For vision models that understand images, here are the results:</p>

<table>
  <thead>
    <tr>
      <th>Model</th>
      <th>Prompt</th>
      <th>Response</th>
    </tr>
  </thead>
  <tbody>
    <tr>
      <td>moondream:1.8b</td>
      <td>1706 tokens/sec</td>
      <td>180 tokens/sec</td>
    </tr>
    <tr>
      <td>gemma3:4b</td>
      <td>995 tokens/sec</td>
      <td>81 tokens/sec</td>
    </tr>
    <tr>
      <td>gemma3n:e4b</td>
      <td>39 tokens/sec</td>
      <td>46 tokens/sec</td>
    </tr>
    <tr>
      <td>llava:7b</td>
      <td>640 tokens/sec</td>
      <td>65 tokens/sec</td>
    </tr>
    <tr>
      <td>qwen3-vl:8b</td>
      <td>246 tokens/sec</td>
      <td>56 tokens/sec</td>
    </tr>
    <tr>
      <td>gemma3:27b</td>
      <td>183 tokens/sec</td>
      <td>18 tokens/sec</td>
    </tr>
    <tr>
      <td>qwen3-vl:32b</td>
      <td>76 tokens/sec</td>
      <td>15 tokens/sec</td>
    </tr>
    <tr>
      <td>llava:34b</td>
      <td>143 tokens/sec</td>
      <td>16 tokens/sec</td>
    </tr>
  </tbody>
</table>

<h3 id="amd-ryzen-9-5950x-16-cores32-threads">AMD Ryzen 9 5950X (16 cores/32 threads)</h3>

<p>This is the CPU-only performance without GPU acceleration.</p>

<p>Here are the benchmark results for models with text generation only:</p>

<table>
  <thead>
    <tr>
      <th>Model</th>
      <th>Prompt</th>
      <th>Response</th>
    </tr>
  </thead>
  <tbody>
    <tr>
      <td>mistral:7b</td>
      <td>61 tokens/sec</td>
      <td>8 tokens/sec</td>
    </tr>
    <tr>
      <td>llama3.1:8b</td>
      <td>62 tokens/sec</td>
      <td>7 tokens/sec</td>
    </tr>
    <tr>
      <td>phi4:14b</td>
      <td>32 tokens/sec</td>
      <td>4 tokens/sec</td>
    </tr>
    <tr>
      <td>gpt-oss:20b</td>
      <td>94 tokens/sec</td>
      <td>8 tokens/sec</td>
    </tr>
    <tr>
      <td>gemma3:27b</td>
      <td>18 tokens/sec</td>
      <td>2 tokens/sec</td>
    </tr>
    <tr>
      <td>qwen3-coder:30b</td>
      <td>79 tokens/sec</td>
      <td>15 tokens/sec</td>
    </tr>
    <tr>
      <td>qwen3:32b</td>
      <td>15 tokens/sec</td>
      <td>2 tokens/sec</td>
    </tr>
    <tr>
      <td>deepseek-r1:32b</td>
      <td>14 tokens/sec</td>
      <td>2 tokens/sec</td>
    </tr>
  </tbody>
</table>

<p>For vision models that understand images, here are the results:</p>

<table>
  <thead>
    <tr>
      <th>Model</th>
      <th>Prompt</th>
      <th>Response</th>
    </tr>
  </thead>
  <tbody>
    <tr>
      <td>moondream:1.8b</td>
      <td>293 tokens/sec</td>
      <td>27 tokens/sec</td>
    </tr>
    <tr>
      <td>gemma3:4b</td>
      <td>63 tokens/sec</td>
      <td>7 tokens/sec</td>
    </tr>
    <tr>
      <td>gemma3n:e4b</td>
      <td>82 tokens/sec</td>
      <td>10 tokens/sec</td>
    </tr>
    <tr>
      <td>llava:7b</td>
      <td>65 tokens/sec</td>
      <td>8 tokens/sec</td>
    </tr>
    <tr>
      <td>qwen3-vl:8b</td>
      <td>26 tokens/sec</td>
      <td>6 tokens/sec</td>
    </tr>
    <tr>
      <td>gemma3:27b</td>
      <td>18 tokens/sec</td>
      <td>2 tokens/sec</td>
    </tr>
    <tr>
      <td>qwen3-vl:32b</td>
      <td>10 tokens/sec</td>
      <td>1 tokens/sec</td>
    </tr>
    <tr>
      <td>llava:34b</td>
      <td>14 tokens/sec</td>
      <td>2 tokens/sec</td>
    </tr>
  </tbody>
</table>

<h2 id="conclusion">Conclusion</h2>

<p>The AMD Radeon AI PRO R9700 demonstrates strong performance across a variety of large language models, handling both text-only and vision-capable models effectively. With its substantial VRAM and robust architecture, the R9700 is well-suited for professional AI workloads, making it a compelling choice for developers and researchers working with LLMs. Now, I can take full advantage of AMD’s capabilities for my AI projects and code with local LLMs.</p>]]></content><author><name>Anton Skshidlevsky</name></author><category term="amdgpu" /><category term="llm" /><category term="benchmark" /><summary type="html"><![CDATA[Benchmarking large language models (LLMs) on AMD's Radeon AI PRO R9700 GPU using Ollama on Linux.]]></summary><media:thumbnail xmlns:media="http://search.yahoo.com/mrss/" url="https://meefik.dev/assets/images/llm-performance.png" /><media:content medium="image" url="https://meefik.dev/assets/images/llm-performance.png" xmlns:media="http://search.yahoo.com/mrss/" /></entry><entry><title type="html">Serverless WebRTC conferencing with E2E encryption</title><link href="https://meefik.dev/2025/10/05/webrtc-p2p-conferencing/" rel="alternate" type="text/html" title="Serverless WebRTC conferencing with E2E encryption" /><published>2025-10-05T18:00:00+00:00</published><updated>2025-10-05T18:00:00+00:00</updated><id>https://meefik.dev/2025/10/05/webrtc-p2p-conferencing</id><content type="html" xml:base="https://meefik.dev/2025/10/05/webrtc-p2p-conferencing/"><![CDATA[<p>Building reliable, privacy-respecting peer-to-peer conferencing can be surprisingly simple when you split responsibilities cleanly: media transport (WebRTC) and signaling (a tiny transport for exchanging SDP and ICE). I built <a href="https://github.com/meefik/p2p">a minimal library</a> to demonstrate that split and to enable serverless workflows using whatever signaling channel you prefer — from in-memory drivers for demos to NATS-based pub/sub for distributed apps.</p>

<p>This post describes the library’s purpose, core design, how to use it, and a practical example of a <a href="https://nats.io">NATS</a> signaling driver with end-to-end encryption using the browser <a href="https://developer.mozilla.org/docs/Web/API/Web_Crypto_API">Web Crypto API</a>.</p>

<p><img src="/assets/images/p2p-demo.png" alt="demo" title="Peer-to-Peer Video Conference" /></p>

<p>Just try it out: <a href="https://www.youtube.com/watch?v=2W9C71-L8AE">demo</a> | <a href="https://github.com/meefik/p2p">source code</a></p>

<!--more-->

<h2 id="why-this-library">Why this library</h2>

<p>The library focuses on three goals:</p>

<ul>
  <li>Minimal surface area: two primitives (Sender and Receiver) that cover the common conferencing pattern: one broadcaster, many receivers.</li>
  <li>Signaling-agnostic: you provide a small driver implementing subscribe/unsubscribe/dispatch and the library works with any transport.</li>
  <li>Practical privacy: support optional E2E encryption at the signaling layer so session offers/answers and candidates are not exposed in plaintext on the bus.</li>
</ul>

<h2 id="design-overview">Design overview</h2>

<p>At its core, p2p is small:</p>

<ul>
  <li>Sender: creates outgoing RTCPeerConnections, publishes a local MediaStream and optional per-peer RTCDataChannels, and emits offers to receivers.</li>
  <li>Receiver: listens for offers, answers them, and surfaces remote streams and incoming data messages to the application.</li>
</ul>

<p>Signaling expectations are intentionally simple: drivers produce messages scoped to namespaces (arrays/keys). The library uses namespaces such as [“sender”, room], [“receiver”, room, id], etc. Messages include typed payloads (invoke, offer, answer, candidate, sync, dispose).</p>

<h2 id="quick-start">Quick start</h2>

<p><strong>1.</strong> Install the library:</p>

<div class="language-sh highlighter-rouge"><div class="highlight"><pre class="highlight"><code>npm <span class="nb">install </span>p2p
</code></pre></div></div>

<p><strong>2.</strong> Implement a signaling driver that supports subscribe/unsubscribe/dispatch.</p>

<p>Here’s a minimal conceptual example:</p>

<div class="language-javascript highlighter-rouge"><div class="highlight"><pre class="highlight"><code><span class="kd">class</span> <span class="nc">MyDriver</span> <span class="p">{</span>
  <span class="nf">subscribe</span><span class="p">(</span><span class="nx">namespace</span><span class="p">,</span> <span class="nx">handler</span><span class="p">)</span> <span class="p">{</span> <span class="cm">/* ... */</span> <span class="p">}</span>
  <span class="nf">unsubscribe</span><span class="p">(</span><span class="nx">namespace</span><span class="p">,</span> <span class="nx">handler</span><span class="p">)</span> <span class="p">{</span> <span class="cm">/* ... */</span> <span class="p">}</span>
  <span class="nf">dispatch</span><span class="p">(</span><span class="nx">namespace</span><span class="p">,</span> <span class="nx">message</span><span class="p">)</span> <span class="p">{</span> <span class="cm">/* ... */</span> <span class="p">}</span>
<span class="p">}</span>
</code></pre></div></div>

<p>Instantiate your driver:</p>

<div class="language-javascript highlighter-rouge"><div class="highlight"><pre class="highlight"><code><span class="kd">const</span> <span class="nx">driver</span> <span class="o">=</span> <span class="k">new</span> <span class="nc">MyDriver</span><span class="p">();</span>
</code></pre></div></div>

<p><strong>3.</strong> Start a Receiver in the same room to discover and receive streams.</p>

<p>Instantiate Receiver with the same driver:</p>

<div class="language-javascript highlighter-rouge"><div class="highlight"><pre class="highlight"><code><span class="kd">const</span> <span class="nx">receiver</span> <span class="o">=</span> <span class="k">new</span> <span class="nc">Receiver</span><span class="p">({</span> <span class="nx">driver</span> <span class="p">});</span>
<span class="nx">receiver</span><span class="p">.</span><span class="nf">addEventListener</span><span class="p">(</span><span class="dl">'</span><span class="s1">stream</span><span class="dl">'</span><span class="p">,</span> <span class="p">(</span><span class="nx">e</span><span class="p">)</span> <span class="o">=&gt;</span> <span class="p">{</span>
  <span class="kd">const</span> <span class="p">{</span> <span class="nx">id</span><span class="p">,</span> <span class="nx">stream</span> <span class="p">}</span> <span class="o">=</span> <span class="nx">e</span><span class="p">.</span><span class="nx">detail</span><span class="p">;</span>
  <span class="c1">// handle incoming MediaStream</span>
<span class="p">});</span>
<span class="nx">receiver</span><span class="p">.</span><span class="nf">addEventListener</span><span class="p">(</span><span class="dl">'</span><span class="s1">connect</span><span class="dl">'</span><span class="p">,</span> <span class="p">(</span><span class="nx">e</span><span class="p">)</span> <span class="o">=&gt;</span> <span class="p">{</span>
  <span class="kd">const</span> <span class="p">{</span> <span class="nx">id</span> <span class="p">}</span> <span class="o">=</span> <span class="nx">e</span><span class="p">.</span><span class="nx">detail</span><span class="p">;</span>
  <span class="c1">// handle peer connection established</span>
<span class="p">});</span>
<span class="nx">receiver</span><span class="p">.</span><span class="nf">addEventListener</span><span class="p">(</span><span class="dl">'</span><span class="s1">dispose</span><span class="dl">'</span><span class="p">,</span> <span class="p">(</span><span class="nx">e</span><span class="p">)</span> <span class="o">=&gt;</span> <span class="p">{</span>
  <span class="kd">const</span> <span class="p">{</span> <span class="nx">id</span> <span class="p">}</span> <span class="o">=</span> <span class="nx">e</span><span class="p">.</span><span class="nx">detail</span><span class="p">;</span>
  <span class="c1">// handle peer disconnection</span>
<span class="p">});</span>
</code></pre></div></div>

<p>Start the receiver in the same room:</p>

<div class="language-javascript highlighter-rouge"><div class="highlight"><pre class="highlight"><code><span class="nx">receiver</span><span class="p">.</span><span class="nf">start</span><span class="p">({</span> <span class="na">room</span><span class="p">:</span> <span class="dl">'</span><span class="s1">demo-room</span><span class="dl">'</span> <span class="p">});</span>
</code></pre></div></div>

<p><strong>4.</strong> Create and start a Sender to broadcast local media.</p>

<p>Instantiate Sender with your driver and options:</p>

<div class="language-javascript highlighter-rouge"><div class="highlight"><pre class="highlight"><code><span class="kd">const</span> <span class="nx">sender</span> <span class="o">=</span> <span class="k">new</span> <span class="nc">Sender</span><span class="p">({</span> <span class="nx">driver</span> <span class="p">});</span>
</code></pre></div></div>

<p>Start the sender with the stream and a room name:</p>

<div class="language-javascript highlighter-rouge"><div class="highlight"><pre class="highlight"><code><span class="kd">const</span> <span class="nx">stream</span> <span class="o">=</span> <span class="k">await</span> <span class="nb">navigator</span><span class="p">.</span><span class="nx">mediaDevices</span><span class="p">.</span><span class="nf">getUserMedia</span><span class="p">({</span>
  <span class="na">video</span><span class="p">:</span> <span class="kc">true</span><span class="p">,</span>
  <span class="na">audio</span><span class="p">:</span> <span class="kc">true</span>
<span class="p">});</span>
<span class="nx">sender</span><span class="p">.</span><span class="nf">start</span><span class="p">({</span> <span class="nx">stream</span><span class="p">,</span> <span class="na">room</span><span class="p">:</span> <span class="dl">'</span><span class="s1">demo-room</span><span class="dl">'</span> <span class="p">});</span>
</code></pre></div></div>

<h2 id="nats-as-a-signaling-transport-with-e2e-encryption">NATS as a signaling transport with E2E encryption</h2>

<p><a href="https://nats.io">NATS</a> is a great lightweight pub/sub for distributed signaling. The demo repository includes a full driver implementation at <a href="https://github.com/meefik/p2p/blob/main/demo/driver/nats.js">demo/driver/nats.js</a>; below is the compact approach and key ideas used there.</p>

<p>Here’s a simple driver implementation using the <a href="https://npmjs.com/package/@nats-io/nats-core">@nats-io/nats-core</a> module:</p>

<div class="language-javascript highlighter-rouge"><div class="highlight"><pre class="highlight"><code><span class="k">import</span> <span class="p">{</span> <span class="nx">wsconnect</span> <span class="p">}</span> <span class="k">from</span> <span class="dl">'</span><span class="s1">@nats-io/nats-core</span><span class="dl">'</span><span class="p">;</span>

<span class="kd">class</span> <span class="nc">NatsDriver</span> <span class="kd">extends</span> <span class="nc">Map</span> <span class="p">{</span>
  <span class="nf">constructor</span><span class="p">({</span> <span class="nx">servers</span> <span class="p">}</span> <span class="o">=</span> <span class="p">{})</span> <span class="p">{</span>
    <span class="k">super</span><span class="p">();</span>
    <span class="k">this</span><span class="p">.</span><span class="nx">servers</span> <span class="o">=</span> <span class="nx">servers</span> <span class="o">||</span> <span class="p">[</span><span class="dl">'</span><span class="s1">wss://demo.nats.io:8443</span><span class="dl">'</span><span class="p">];</span>
  <span class="p">}</span>

  <span class="k">async</span> <span class="nf">open</span><span class="p">()</span> <span class="p">{</span>
    <span class="k">this</span><span class="p">.</span><span class="nx">nc</span> <span class="o">=</span> <span class="k">await</span> <span class="nf">wsconnect</span><span class="p">({</span> <span class="na">servers</span><span class="p">:</span> <span class="k">this</span><span class="p">.</span><span class="nx">servers</span><span class="p">,</span> <span class="na">noEcho</span><span class="p">:</span> <span class="kc">true</span> <span class="p">});</span>
  <span class="p">}</span>

  <span class="k">async</span> <span class="nf">close</span><span class="p">()</span> <span class="p">{</span>
    <span class="k">await</span> <span class="k">this</span><span class="p">.</span><span class="nx">nc</span><span class="p">.</span><span class="nf">drain</span><span class="p">();</span>
  <span class="p">}</span>

  <span class="nf">subscribe</span><span class="p">(</span><span class="nx">namespace</span><span class="p">,</span> <span class="nx">handler</span><span class="p">)</span> <span class="p">{</span>
    <span class="kd">const</span> <span class="nx">ns</span> <span class="o">=</span> <span class="nx">namespace</span><span class="p">.</span><span class="nf">join</span><span class="p">(</span><span class="dl">'</span><span class="s1">:</span><span class="dl">'</span><span class="p">);</span>
    <span class="kd">const</span> <span class="nx">sub</span> <span class="o">=</span> <span class="k">this</span><span class="p">.</span><span class="nx">nc</span><span class="p">.</span><span class="nf">subscribe</span><span class="p">(</span><span class="nx">ns</span><span class="p">,</span> <span class="p">{</span>
      <span class="na">callback</span><span class="p">:</span> <span class="k">async </span><span class="p">(</span><span class="nx">err</span><span class="p">,</span> <span class="nx">msg</span><span class="p">)</span> <span class="o">=&gt;</span> <span class="p">{</span>
        <span class="k">if </span><span class="p">(</span><span class="nx">err</span><span class="p">)</span> <span class="k">return</span> <span class="nx">console</span><span class="p">.</span><span class="nf">error</span><span class="p">(</span><span class="nx">err</span><span class="p">);</span>
        <span class="kd">const</span> <span class="nx">payload</span> <span class="o">=</span> <span class="nx">JSON</span><span class="p">.</span><span class="nf">parse</span><span class="p">(</span><span class="k">new</span> <span class="nc">TextDecoder</span><span class="p">().</span><span class="nf">decode</span><span class="p">(</span><span class="nx">msg</span><span class="p">.</span><span class="nx">data</span><span class="p">));</span>
        <span class="nf">handler</span><span class="p">(</span><span class="nx">payload</span><span class="p">);</span>
      <span class="p">},</span>
    <span class="p">});</span>
    <span class="k">if </span><span class="p">(</span><span class="o">!</span><span class="k">this</span><span class="p">.</span><span class="nf">has</span><span class="p">(</span><span class="nx">ns</span><span class="p">))</span> <span class="p">{</span>
      <span class="k">this</span><span class="p">.</span><span class="nf">set</span><span class="p">(</span><span class="nx">ns</span><span class="p">,</span> <span class="k">new</span> <span class="nc">Map</span><span class="p">());</span>
    <span class="p">}</span>
    <span class="k">this</span><span class="p">.</span><span class="nf">get</span><span class="p">(</span><span class="nx">ns</span><span class="p">).</span><span class="nf">set</span><span class="p">(</span><span class="nx">handler</span><span class="p">,</span> <span class="nx">sub</span><span class="p">);</span>
  <span class="p">}</span>

  <span class="nf">unsubscribe</span><span class="p">(</span><span class="nx">namespace</span><span class="p">,</span> <span class="nx">handler</span><span class="p">)</span> <span class="p">{</span>
    <span class="kd">const</span> <span class="nx">ns</span> <span class="o">=</span> <span class="nx">namespace</span><span class="p">.</span><span class="nf">join</span><span class="p">(</span><span class="dl">'</span><span class="s1">:</span><span class="dl">'</span><span class="p">);</span>
    <span class="kd">const</span> <span class="nx">sub</span> <span class="o">=</span> <span class="k">this</span><span class="p">.</span><span class="nf">get</span><span class="p">(</span><span class="nx">ns</span><span class="p">)?.</span><span class="nf">get</span><span class="p">(</span><span class="nx">handler</span><span class="p">);</span>
    <span class="k">if </span><span class="p">(</span><span class="nx">sub</span><span class="p">)</span> <span class="p">{</span>
      <span class="nx">sub</span><span class="p">.</span><span class="nf">unsubscribe</span><span class="p">();</span>
      <span class="k">this</span><span class="p">.</span><span class="nf">get</span><span class="p">(</span><span class="nx">ns</span><span class="p">).</span><span class="k">delete</span><span class="p">(</span><span class="nx">handler</span><span class="p">);</span>
    <span class="p">}</span>
    <span class="k">if </span><span class="p">(</span><span class="o">!</span><span class="k">this</span><span class="p">.</span><span class="nf">get</span><span class="p">(</span><span class="nx">ns</span><span class="p">)?.</span><span class="nx">size</span><span class="p">)</span> <span class="p">{</span>
      <span class="k">this</span><span class="p">.</span><span class="k">delete</span><span class="p">(</span><span class="nx">ns</span><span class="p">);</span>
    <span class="p">}</span>
  <span class="p">}</span>

  <span class="nf">dispatch</span><span class="p">(</span><span class="nx">namespace</span><span class="p">,</span> <span class="nx">message</span><span class="p">)</span> <span class="p">{</span>
    <span class="kd">const</span> <span class="nx">ns</span> <span class="o">=</span> <span class="nx">namespace</span><span class="p">.</span><span class="nf">join</span><span class="p">(</span><span class="dl">'</span><span class="s1">:</span><span class="dl">'</span><span class="p">);</span>
    <span class="k">if </span><span class="p">(</span><span class="k">this</span><span class="p">.</span><span class="nx">nc</span><span class="p">)</span> <span class="p">{</span>
      <span class="kd">const</span> <span class="nx">data</span> <span class="o">=</span> <span class="k">new</span> <span class="nc">TextEncoder</span><span class="p">().</span><span class="nf">encode</span><span class="p">(</span><span class="nx">JSON</span><span class="p">.</span><span class="nf">stringify</span><span class="p">(</span><span class="nx">message</span><span class="p">));</span>
      <span class="k">this</span><span class="p">.</span><span class="nx">nc</span><span class="p">.</span><span class="nf">publish</span><span class="p">(</span><span class="nx">ns</span><span class="p">,</span> <span class="nx">data</span><span class="p">);</span>
    <span class="p">}</span>
  <span class="p">}</span>
<span class="p">}</span>
</code></pre></div></div>

<p>If you want the signaling payloads to be encrypted end-to-end (so the NATS server only sees opaque blobs), you can apply symmetric encryption on top of the driver.</p>

<p>High-level strategy:</p>
<ul>
  <li>Derive an AES-GCM key from a shared passphrase (or pre-shared secret) using SHA-256.</li>
  <li>For every outbound message: encode JSON → encrypt with AES-GCM (random IV) → publish binary payload.</li>
  <li>For inbound messages: decrypt using AES-GCM with the same key → parse JSON → deliver to handler.</li>
  <li>Keep namespaces and message types unchanged; only payload bytes are encrypted.</li>
</ul>

<p>Here’s a compact encryption helper (browser) using <a href="https://developer.mozilla.org/docs/Web/API/Web_Crypto_API">Web Crypto API</a>.</p>

<p>Derive AES-GCM CryptoKey from passphrase via SHA-256:</p>

<div class="language-javascript highlighter-rouge"><div class="highlight"><pre class="highlight"><code><span class="k">async</span> <span class="kd">function</span> <span class="nf">createEncryptionKey</span><span class="p">(</span><span class="nx">secret</span><span class="p">)</span> <span class="p">{</span>
  <span class="kd">const</span> <span class="nx">secretHash</span> <span class="o">=</span> <span class="k">await</span> <span class="nx">crypto</span><span class="p">.</span><span class="nx">subtle</span><span class="p">.</span><span class="nf">digest</span><span class="p">(</span>
    <span class="dl">'</span><span class="s1">SHA-256</span><span class="dl">'</span><span class="p">,</span>
    <span class="k">new</span> <span class="nc">TextEncoder</span><span class="p">().</span><span class="nf">encode</span><span class="p">(</span><span class="nx">secret</span><span class="p">),</span>
  <span class="p">);</span>
  <span class="k">return</span> <span class="k">await</span> <span class="nx">crypto</span><span class="p">.</span><span class="nx">subtle</span><span class="p">.</span><span class="nf">importKey</span><span class="p">(</span>
    <span class="dl">'</span><span class="s1">raw</span><span class="dl">'</span><span class="p">,</span>
    <span class="nx">secretHash</span><span class="p">,</span>
    <span class="p">{</span> <span class="na">name</span><span class="p">:</span> <span class="dl">'</span><span class="s1">AES-GCM</span><span class="dl">'</span> <span class="p">},</span>
    <span class="kc">false</span><span class="p">,</span>
    <span class="p">[</span><span class="dl">'</span><span class="s1">encrypt</span><span class="dl">'</span><span class="p">,</span> <span class="dl">'</span><span class="s1">decrypt</span><span class="dl">'</span><span class="p">],</span>
  <span class="p">);</span>
<span class="p">}</span>
</code></pre></div></div>

<p>Prepend a 12-byte IV + ciphertext:</p>

<div class="language-javascript highlighter-rouge"><div class="highlight"><pre class="highlight"><code><span class="k">async</span> <span class="kd">function</span> <span class="nf">encrypt</span><span class="p">(</span><span class="nx">payload</span><span class="p">,</span> <span class="nx">cryptoKey</span><span class="p">)</span> <span class="p">{</span>
  <span class="kd">const</span> <span class="nx">iv</span> <span class="o">=</span> <span class="nx">crypto</span><span class="p">.</span><span class="nf">getRandomValues</span><span class="p">(</span><span class="k">new</span> <span class="nc">Uint8Array</span><span class="p">(</span><span class="mi">12</span><span class="p">));</span>
  <span class="kd">const</span> <span class="nx">ciphertext</span> <span class="o">=</span> <span class="k">new</span> <span class="nc">Uint8Array</span><span class="p">(</span>
    <span class="k">await</span> <span class="nx">crypto</span><span class="p">.</span><span class="nx">subtle</span><span class="p">.</span><span class="nf">encrypt</span><span class="p">({</span> <span class="na">name</span><span class="p">:</span> <span class="dl">'</span><span class="s1">AES-GCM</span><span class="dl">'</span><span class="p">,</span> <span class="nx">iv</span> <span class="p">},</span> <span class="nx">cryptoKey</span><span class="p">,</span> <span class="nx">payload</span><span class="p">),</span>
  <span class="p">);</span>
  <span class="kd">const</span> <span class="nx">data</span> <span class="o">=</span> <span class="k">new</span> <span class="nc">Uint8Array</span><span class="p">(</span><span class="nx">iv</span><span class="p">.</span><span class="nx">byteLength</span> <span class="o">+</span> <span class="nx">ciphertext</span><span class="p">.</span><span class="nx">byteLength</span><span class="p">);</span>
  <span class="nx">data</span><span class="p">.</span><span class="nf">set</span><span class="p">(</span><span class="nx">iv</span><span class="p">,</span> <span class="mi">0</span><span class="p">);</span>
  <span class="nx">data</span><span class="p">.</span><span class="nf">set</span><span class="p">(</span><span class="nx">ciphertext</span><span class="p">,</span> <span class="nx">iv</span><span class="p">.</span><span class="nx">byteLength</span><span class="p">);</span>
  <span class="k">return</span> <span class="nx">data</span><span class="p">;</span>
<span class="p">}</span>
</code></pre></div></div>

<p>Extract IV and decrypt:</p>

<div class="language-javascript highlighter-rouge"><div class="highlight"><pre class="highlight"><code><span class="k">async</span> <span class="kd">function</span> <span class="nf">decrypt</span><span class="p">(</span><span class="nx">data</span><span class="p">,</span> <span class="nx">cryptoKey</span><span class="p">)</span> <span class="p">{</span>
  <span class="kd">const</span> <span class="nx">iv</span> <span class="o">=</span> <span class="nx">data</span><span class="p">.</span><span class="nf">slice</span><span class="p">(</span><span class="mi">0</span><span class="p">,</span> <span class="mi">12</span><span class="p">);</span>
  <span class="kd">const</span> <span class="nx">ct</span> <span class="o">=</span> <span class="nx">data</span><span class="p">.</span><span class="nf">slice</span><span class="p">(</span><span class="mi">12</span><span class="p">);</span>
  <span class="kd">const</span> <span class="nx">payload</span> <span class="o">=</span> <span class="k">await</span> <span class="nx">crypto</span><span class="p">.</span><span class="nx">subtle</span><span class="p">.</span><span class="nf">decrypt</span><span class="p">({</span> <span class="na">name</span><span class="p">:</span> <span class="dl">'</span><span class="s1">AES-GCM</span><span class="dl">'</span><span class="p">,</span> <span class="nx">iv</span> <span class="p">},</span> <span class="nx">cryptoKey</span><span class="p">,</span> <span class="nx">ct</span><span class="p">);</span>
  <span class="k">return</span> <span class="nx">payload</span><span class="p">;</span>
<span class="p">}</span>
</code></pre></div></div>

<p>Example usage (conceptual snippet):</p>

<div class="language-javascript highlighter-rouge"><div class="highlight"><pre class="highlight"><code><span class="c1">// Create a key from a human passphrase</span>
<span class="kd">const</span> <span class="nx">key</span> <span class="o">=</span> <span class="k">await</span> <span class="nf">createEncryptionKey</span><span class="p">(</span><span class="dl">'</span><span class="s1">room-secret-passphrase</span><span class="dl">'</span><span class="p">);</span>

<span class="c1">// Encrypt message (payload is Uint8Array)</span>
<span class="kd">const</span> <span class="nx">payload</span> <span class="o">=</span> <span class="k">new</span> <span class="nc">TextEncoder</span><span class="p">().</span><span class="nf">encode</span><span class="p">(</span><span class="dl">'</span><span class="s1">Secret message</span><span class="dl">'</span><span class="p">);</span>
<span class="kd">const</span> <span class="nx">data</span> <span class="o">=</span> <span class="k">await</span> <span class="nf">encrypt</span><span class="p">(</span><span class="nx">payload</span><span class="p">,</span> <span class="nx">key</span><span class="p">);</span>

<span class="c1">// returns Uint8Array with IV+ciphertext</span>
<span class="nx">console</span><span class="p">.</span><span class="nf">log</span><span class="p">(</span><span class="dl">'</span><span class="s1">encrypted data</span><span class="dl">'</span><span class="p">,</span> <span class="nx">data</span><span class="p">);</span>

<span class="c1">// Decrypt message</span>
<span class="kd">const</span> <span class="nx">decryptedBytes</span> <span class="o">=</span> <span class="k">await</span> <span class="nf">decrypt</span><span class="p">(</span><span class="nx">data</span><span class="p">,</span> <span class="nx">key</span><span class="p">);</span>
<span class="kd">const</span> <span class="nx">message</span> <span class="o">=</span> <span class="k">new</span> <span class="nc">TextDecoder</span><span class="p">().</span><span class="nf">decode</span><span class="p">(</span><span class="nx">decryptedBytes</span><span class="p">);</span>

<span class="c1">// returns original message</span>
<span class="nx">console</span><span class="p">.</span><span class="nf">log</span><span class="p">(</span><span class="dl">'</span><span class="s1">decrypted message</span><span class="dl">'</span><span class="p">,</span> <span class="nx">message</span><span class="p">);</span>
</code></pre></div></div>

<p>Integrate encryption into the NATS driver by wrapping dispatch/subscribe methods to encrypt/decrypt payloads. Here is diff of the modified methods:</p>

<div class="language-diff highlighter-rouge"><div class="highlight"><pre class="highlight"><code><span class="gd">-  async open() {
</span><span class="gi">+  async open(secret) {
</span>     this.nc = await wsconnect({ servers: this.servers, noEcho: true });
<span class="gi">+    if (secret) {
+      this.cryptoKey = await createEncryptionKey(secret);
+    }
</span>   }
 
   async close() {
     const sub = this.nc.subscribe(ns, {
       callback: async (err, msg) =&gt; {
         if (err) return console.error(err);
<span class="gd">-        const payload = JSON.parse(new TextEncoder().decode(msg.data));
</span><span class="gi">+        let data = msg.data;
+        if (this.cryptoKey) {
+          data = await decrypt(data, this.cryptoKey);
+        }
+        const payload = JSON.parse(new TextDecoder().decode(data));
</span>         handler(payload);
       },
     });
    if (!this.has(ns)) {
      this.set(ns, new Map());
    }
    this.get(ns).set(handler, sub);
  }
<span class="err">
</span>   dispatch(namespace, message) {
     const ns = namespace.join(':');
     if (this.nc) {
<span class="gd">-      const data = new TextEncoder().encode(JSON.stringify(message));
</span><span class="gi">+      let data = new TextEncoder().encode(JSON.stringify(message));
+      if (this.cryptoKey) {
+        data = await encrypt(data, this.cryptoKey);
+      }
</span>       this.nc.publish(ns, data);
     }
   }
</code></pre></div></div>

<p>Operational considerations:</p>

<ul>
  <li>If you run NATS in production, use authentication/authorization and TLS.</li>
  <li>For real-world NAT traversal include TURN servers in iceServers.</li>
  <li>For larger conferences, consider SFU architecture rather than pure p2p (p2p scales poorly with N participants).</li>
  <li>The encrypted signaling only protects SDP and candidates; media still flows directly between peers (or via TURN) and should be protected by SRTP (it’s part of WebRTC).</li>
</ul>

<h2 id="conclusion">Conclusion</h2>

<p>This project shows how a small, well-factored library can enable flexible, serverless peer-to-peer conferencing while giving you control over signaling and privacy. The NATS driver with E2E encryption is a practical option for distributed systems where you want to keep signaling private without a heavy backend.</p>

<p>This library is a good place to start. However, if you want to build more complex applications that include multiple data channels, two-way peer connections, additional built-in drivers or extra features, take a look at the <a href="https://peerix.dev">Peerix</a> project, which is based on these peer-to-peer ideas and offers a richer API and ecosystem.</p>]]></content><author><name>Anton Skshidlevsky</name></author><category term="webrtc" /><category term="javascript" /><summary type="html"><![CDATA[Building a peer-to-peer WebRTC conferencing system with NATS for signaling and end-to-end encryption using the P2P library.]]></summary><media:thumbnail xmlns:media="http://search.yahoo.com/mrss/" url="https://meefik.dev/assets/images/p2p-demo.png" /><media:content medium="image" url="https://meefik.dev/assets/images/p2p-demo.png" xmlns:media="http://search.yahoo.com/mrss/" /></entry><entry><title type="html">How to adjust AMD GPU power consumption on Linux</title><link href="https://meefik.dev/2025/09/20/amdgpu-power-consumption/" rel="alternate" type="text/html" title="How to adjust AMD GPU power consumption on Linux" /><published>2025-09-20T18:00:00+00:00</published><updated>2025-09-20T18:00:00+00:00</updated><id>https://meefik.dev/2025/09/20/amdgpu-power-consumption</id><content type="html" xml:base="https://meefik.dev/2025/09/20/amdgpu-power-consumption/"><![CDATA[<p>If you have a PC running Linux with an AMD GPU, you can change your GPU performance level. By default, <a href="https://rocm.docs.amd.com/projects/install-on-linux/en/latest/reference/user-kernel-space-compat-matrix.html">the AMDGPU driver</a> uses the “auto” performance level. But if you don’t need high performance, you can set it to “low” to reduce power consumption, heat generation, and fan noise.</p>

<p><img src="/assets/images/amdgpu-power-level.png" alt="amd_gpu_power_level" title="AMD GPU power consumption before and after changing performance level" /></p>

<p>On my system, this change reduced the GPU power consumption from 30W to 15W in idle state and completely eliminated fan spinning.</p>

<!--more-->

<p>You can check the current performance level with:</p>

<div class="language-sh highlighter-rouge"><div class="highlight"><pre class="highlight"><code>rocm-smi <span class="nt">--showperflevel</span>
rocm-smi <span class="nt">--showprofile</span>
<span class="c"># or</span>
<span class="nb">cat</span> /sys/class/drm/card0/device/power_dpm_force_performance_level
<span class="nb">cat</span> /sys/class/drm/card0/device/pp_power_profile_mode
</code></pre></div></div>

<p>You can change the performance level on the fly with (<code class="language-plaintext highlighter-rouge">low</code> - minimum performance; <code class="language-plaintext highlighter-rouge">auto</code> - maximum performance):</p>

<div class="language-sh highlighter-rouge"><div class="highlight"><pre class="highlight"><code>rocm-smi <span class="nt">--setperflevel</span> <span class="s2">"low"</span>
<span class="c"># or</span>
<span class="nb">echo</span> <span class="s2">"low"</span> | <span class="nb">sudo tee</span> /sys/class/drm/card0/device/power_dpm_force_performance_level
</code></pre></div></div>

<p>Or, you can change the power profile mode (2 - <code class="language-plaintext highlighter-rouge">POWER_SAVING</code>; 5 - <code class="language-plaintext highlighter-rouge">COMPUTE</code>):</p>

<div class="language-sh highlighter-rouge"><div class="highlight"><pre class="highlight"><code>rocm-smi <span class="nt">--setprofile</span> <span class="s2">"POWER SAVING"</span>
<span class="c"># or</span>
<span class="nb">echo </span>2 | <span class="nb">sudo tee</span> /sys/class/drm/card0/device/pp_power_profile_mode
</code></pre></div></div>

<p>Additionally, you can limit the maximum power consumption (210W in this example, down from the 300W default):</p>

<div class="language-sh highlighter-rouge"><div class="highlight"><pre class="highlight"><code><span class="nb">echo </span>210000000 | <span class="nb">sudo tee</span> /sys/class/drm/card0/device/hwmon/hwmon<span class="k">*</span>/power1_cap
</code></pre></div></div>

<p>To make this change permanent, create a udev rule:</p>

<div class="language-sh highlighter-rouge"><div class="highlight"><pre class="highlight"><code><span class="nb">cat</span> <span class="o">&lt;&lt;</span> <span class="no">EOF</span><span class="sh"> | sudo tee /etc/udev/rules.d/30-amdgpu-power.rules
ACTION=="add|change", SUBSYSTEM=="pci", DRIVER=="amdgpu", ATTR{power_dpm_force_performance_level}="low"
ACTION=="add|change", SUBSYSTEM=="pci", DRIVER=="amdgpu", ATTR{pp_power_profile_mode}="2"
ACTION=="add|change", SUBSYSTEM=="hwmon", ATTR{name}=="amdgpu", ATTR{power1_cap}="210000000"
</span><span class="no">EOF
</span><span class="c"># apply and verify</span>
<span class="nb">sudo </span>udevadm control <span class="nt">--reload-rules</span>
<span class="nb">sudo </span>udevadm trigger <span class="nt">--subsystem-match</span><span class="o">=</span>pci <span class="nt">--subsystem-match</span><span class="o">=</span>hwmon
</code></pre></div></div>

<p>After that, the AMD GPU will use the “low” performance level at each boot.</p>

<p>By the way, you can also change your CPU performance profile with the command:</p>

<div class="language-sh highlighter-rouge"><div class="highlight"><pre class="highlight"><code>powerprofilesctl <span class="nb">set </span>power-saver
</code></pre></div></div>

<p>Supported options: <code class="language-plaintext highlighter-rouge">power-saver</code>, <code class="language-plaintext highlighter-rouge">balanced</code>, <code class="language-plaintext highlighter-rouge">performance</code>.</p>]]></content><author><name>Anton Skshidlevsky</name></author><category term="amdgpu" /><category term="linux" /><summary type="html"><![CDATA[A simple guide to adjust AMD GPU power consumption by changing performance levels on Linux systems.]]></summary><media:thumbnail xmlns:media="http://search.yahoo.com/mrss/" url="https://meefik.dev/assets/images/amdgpu-power-level.png" /><media:content medium="image" url="https://meefik.dev/assets/images/amdgpu-power-level.png" xmlns:media="http://search.yahoo.com/mrss/" /></entry><entry><title type="html">The story of a (not so) necessary optimization</title><link href="https://meefik.dev/2025/04/20/mongodb-optimization/" rel="alternate" type="text/html" title="The story of a (not so) necessary optimization" /><published>2025-04-20T10:00:00+00:00</published><updated>2025-04-20T10:00:00+00:00</updated><id>https://meefik.dev/2025/04/20/mongodb-optimization</id><content type="html" xml:base="https://meefik.dev/2025/04/20/mongodb-optimization/"><![CDATA[<p>I am using <a href="https://nodejs.org/api/cluster.html">Node.js Cluster</a> app with <a href="https://www.mongodb.com/docs/manual/replication/">MongoDB Replica Set</a> in one of my projects. In the server architecture of the system, the <a href="https://www.mongodb.com/docs/manual/changeStreams/">MongoDB Change Streams</a> mechanism is used to implement the horizontal scaling of real-time functionality (video communication, chats, notifications), which allows subscribing to changes occurring in the database. Previously, instead of this mechanism, I used data exchange over UDP directly between the application server hosts until our hoster, for an unknown reason, began to lose a significant portion of packets. Because of this, I had to abandon this method. For the last couple of months, I’ve been wondering how to optimize the operation of this mechanism in MongoDB, or even abandon it in favor of connecting an additional component like <a href="https://redis.io/docs/latest/develop/interact/pubsub/">Redis Pub/Sub</a>. But without a particular need, I didn’t want to multiply entities, <a href="https://en.wikipedia.org/wiki/Occam%27s_razor">Occam’s Razor</a>, you know. Besides, figuring out what’s already there isn’t a bad idea to start with.</p>

<p><img src="/assets/images/mongodb-nodejs-scale.jpg" alt="architecture" title="MongoDB + Node.js scale" /></p>

<!--more-->

<p>First of all, I thought, since our DBMS cluster consists of two hosts (primary and secondary), it would be nice to switch tracking changes via Change Streams to the Secondary host, because millisecond latency in data synchronization between hosts isn’t critical for us here. No problem, done! This allowed us to distribute the load between the cluster hosts, but it still remained uneven. As it turned out, Change Streams on the Secondary host created more CPU load than all other operations on the Primary host. Studying the official documentation, forums, and even AI didn’t provide an understanding of the performance of this function, although the principle of operation eventually became clear.</p>

<p>In practice, experiments revealed that one of the features of Change Streams is that despite the fact that you can subscribe to changes only in a specific collection, it seems that under the hood, all changes across the entire database are collected and then filtered. This leads to the fact that any data changes in the database create an additional, albeit small, load. Digging further, I found an alternative mechanism for tracking the addition of new documents to a collection (which is exactly what we need), called <a href="https://www.mongodb.com/docs/manual/core/tailable-cursors/">Tailable Cursor</a>. It uses the same <a href="https://www.mongodb.com/docs/manual/core/replica-set-oplog/">oplog</a> as Change Streams, but it seems to be structured a bit differently. Unlike Change Streams, it reacts to the addition of documents only to a specific <a href="https://www.mongodb.com/docs/manual/core/capped-collections/">capped collection</a> and doesn’t create CPU load when data changes in other collections. Oh, so that was an option? Okay, done!</p>

<p>Synthetic tests showed a 20% performance increase, which is already good. However, in production, the load on the Secondary node could exceed the Primary by 2 to 5 times! So, there’s still something else going on. I conducted a synthetic test for adding documents to a collection (up to 1000 ops!) that is being monitored. It turned out that the load when adding documents to the monitored collection is 5% higher than to an unmonitored one. But then, it gets more interesting. Each new observer increases the load on the host by roughly 50%! And the more workers the application server has, the greater the load on the database will be. This can be worked with; we just need to reduce the number of listeners. Piece of cake, the new synchronization architecture is done, where within the same host, Node.js cluster workers communicate via the <a href="https://en.wikipedia.org/wiki/Inter-process_communication">IPC</a> (as in the case of working without a Replica Set), and hosts communicate through the Tailable Cursor mechanism in MongoDB. Thus, vertical scaling does not use the database, and horizontal scaling does, but it is limited by the number of application server hosts, not the number of its workers.</p>

<p>In the end, there were three optimizations:</p>

<ol>
  <li>shifting the load to the secondary host;</li>
  <li>replacing change streams with tailable cursor;</li>
  <li>reducing the number of listeners (1 listener - 1 host, instead of 1 listener - 1 worker).</li>
</ol>

<p>In the end, this journey highlighted the importance of not just blindly implementing solutions, but also understanding the underlying technology and continuously seeking improvements. What initially felt like a small tweak turned into a series of optimizations that significantly impacted the system’s efficiency. It’s a good reminder that sometimes, the “unnecessary” optimization can lead to surprisingly valuable insights and improvements.</p>]]></content><author><name>Anton Skshidlevsky</name></author><category term="mongodb" /><summary type="html"><![CDATA[Exploring optimizations in MongoDB Change Streams and Tailable Cursors to improve performance in a Node.js Cluster application.]]></summary><media:thumbnail xmlns:media="http://search.yahoo.com/mrss/" url="https://meefik.dev/assets/images/mongodb-nodejs-scale.jpg" /><media:content medium="image" url="https://meefik.dev/assets/images/mongodb-nodejs-scale.jpg" xmlns:media="http://search.yahoo.com/mrss/" /></entry></feed>